How to customize navigation ?
What is Navigation?
Navigating or moving from one place to another in the apps is an important task for many users. Whether it is moving from one page to another or searching for important content on the app, navigation makes it easy for the users to have an improved digital experience.
Shopimint App Builder has different types of navigation that can help the user move between different app screens.
Types of Navigation in Shopimint
- Main App Navigation
- Bottom Navigation
- Top Right Bar Buttons
- Profile Page Navigation
- Social Media Navigation
Let's see the purpose and functionality of all types of navigation with examples one by one.
01. Main App Navigation
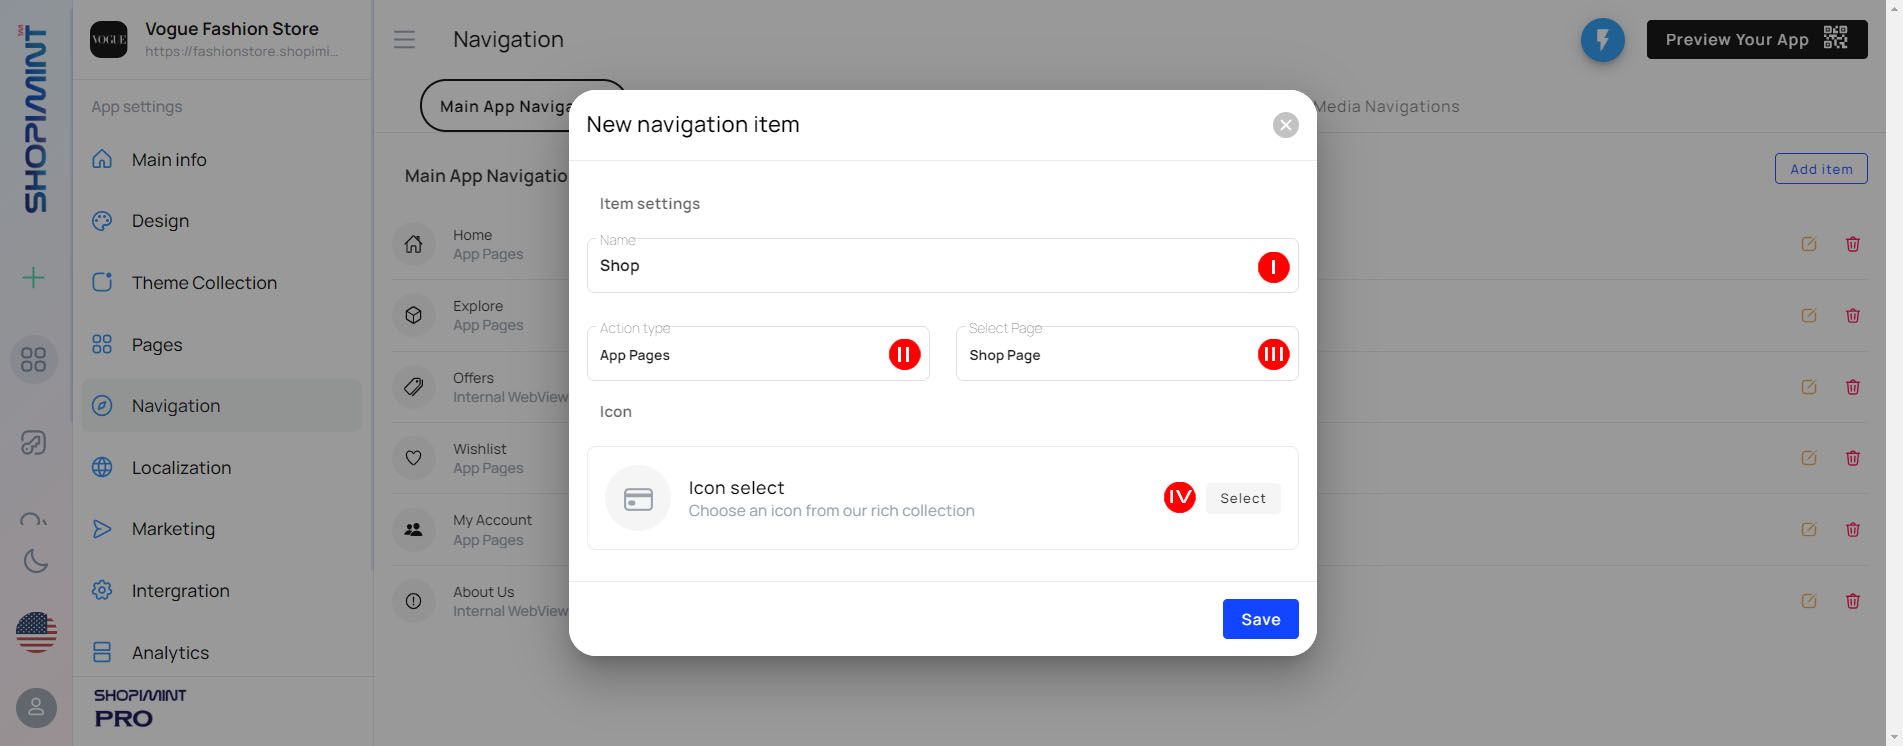
Add New Item
You can add a new item on Main App Navigation Items from Navigation ➝ Main App Navigation➝ Add Item ➝ New Navigation Item
| Option | Description |
|---|---|
| (I) Name | You can add a desired name to a new navigation item in the "Name" text field for the app display. |
| (II) Action Type | Select the correct action type from the box. |
| (III) Select Page | Select the page type or enter the page link for the page type. |
| (IV) Icon | Select an icon for the application display. |
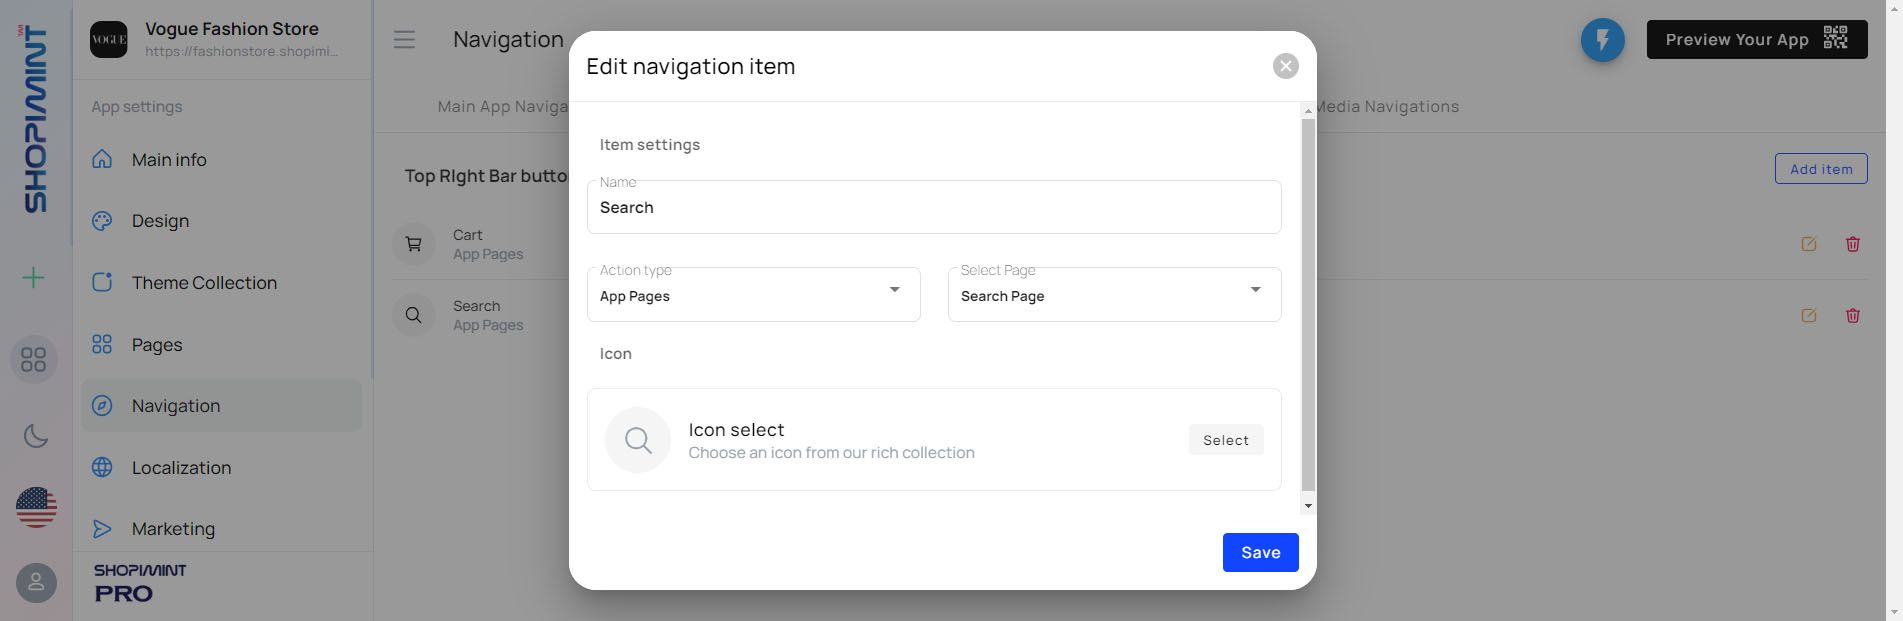
Edit Item
You can edit Main App Navigation Items from Navigation ➝ Main App Navigation➝ Edit Navigation Item
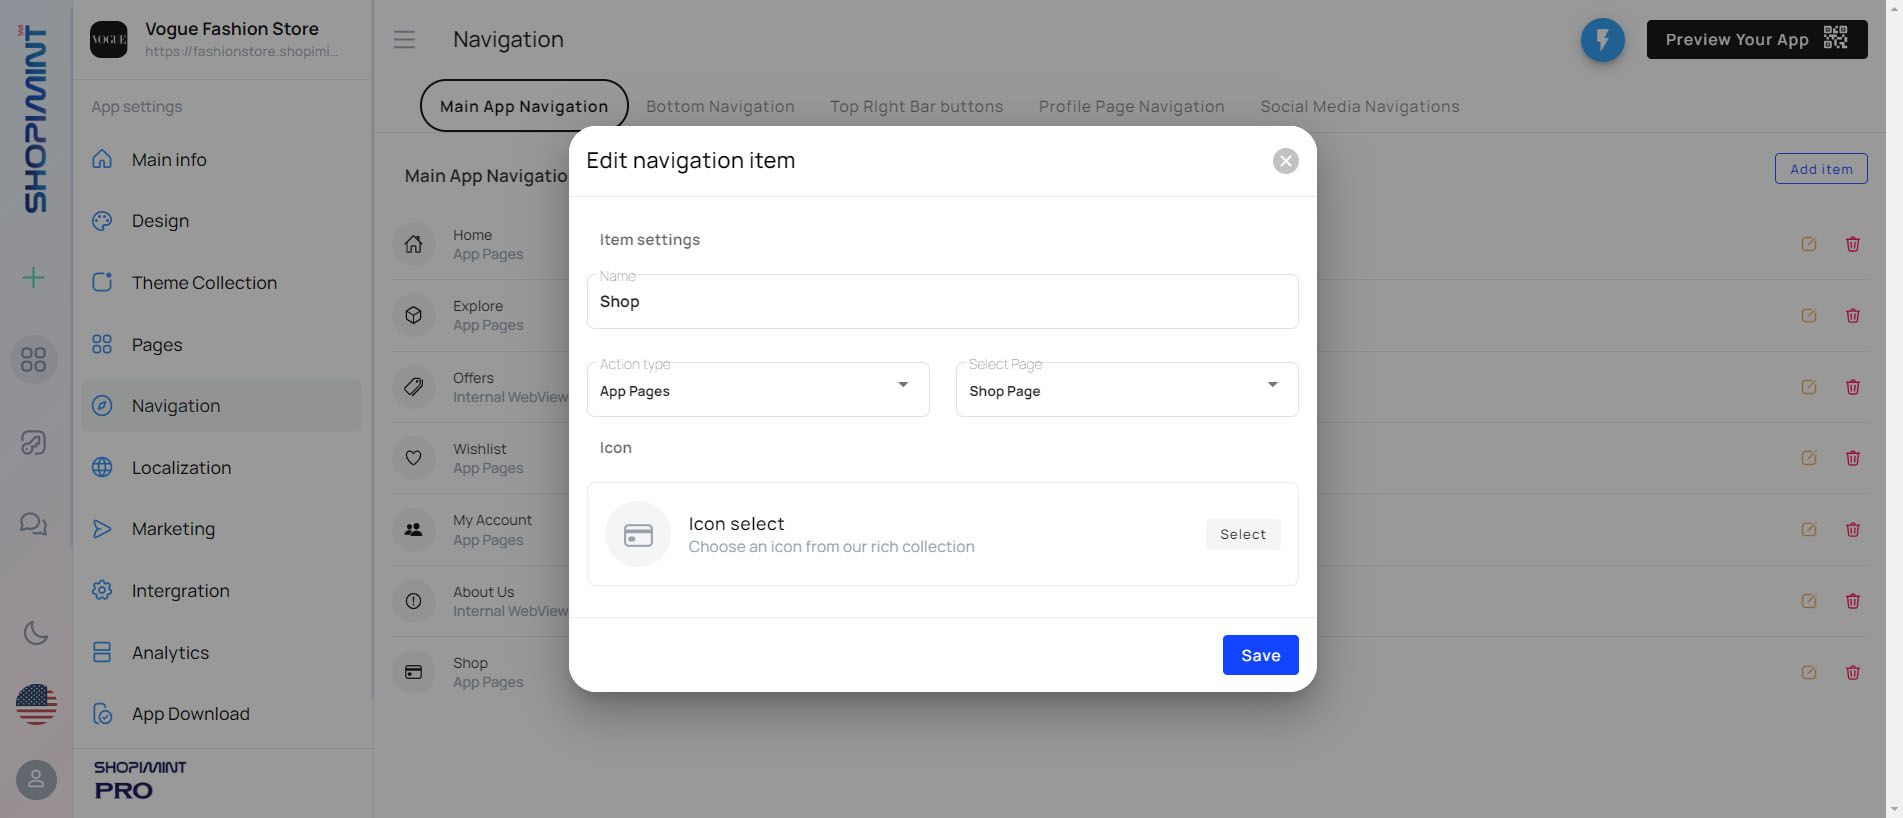
You can edit the details entered using this method. You can delete the inserted item by clicking the 🗑️ icon.
Please make sure to press the Save Changes button to save the changes .
02. Bottom Navigation
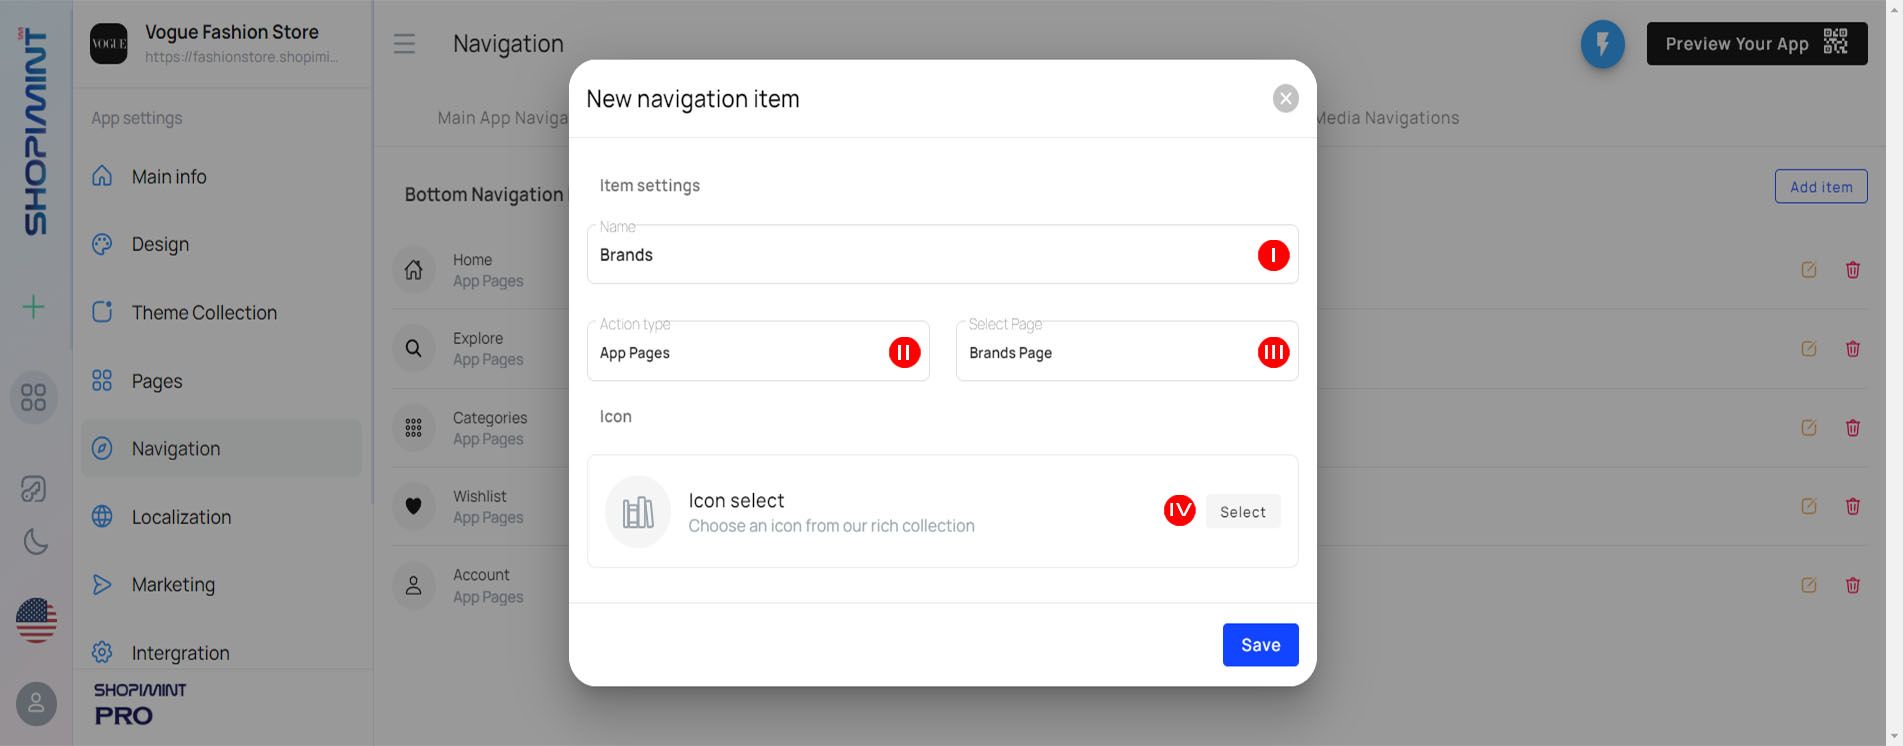
Add New Item
You can add a new item on Bottom Navigation Items from Navigation ➝ Bottom Navigation➝ Add Item ➝ New Navigation Item
| Option | Description |
|---|---|
| (I) Name | You can add a desired name to a new navigation item in the "Name" text field for the app display. |
| (II) Action Type | Select the correct action type from the box. |
| (III) Select Page | Select the page type or enter the page link for the page type. |
| (IV) Icon | Select an icon for the application display. |
Edit Item
You can edit Bottom Navigation Items from Navigation ➝ Bottom Navigation➝ Edit Navigation Item
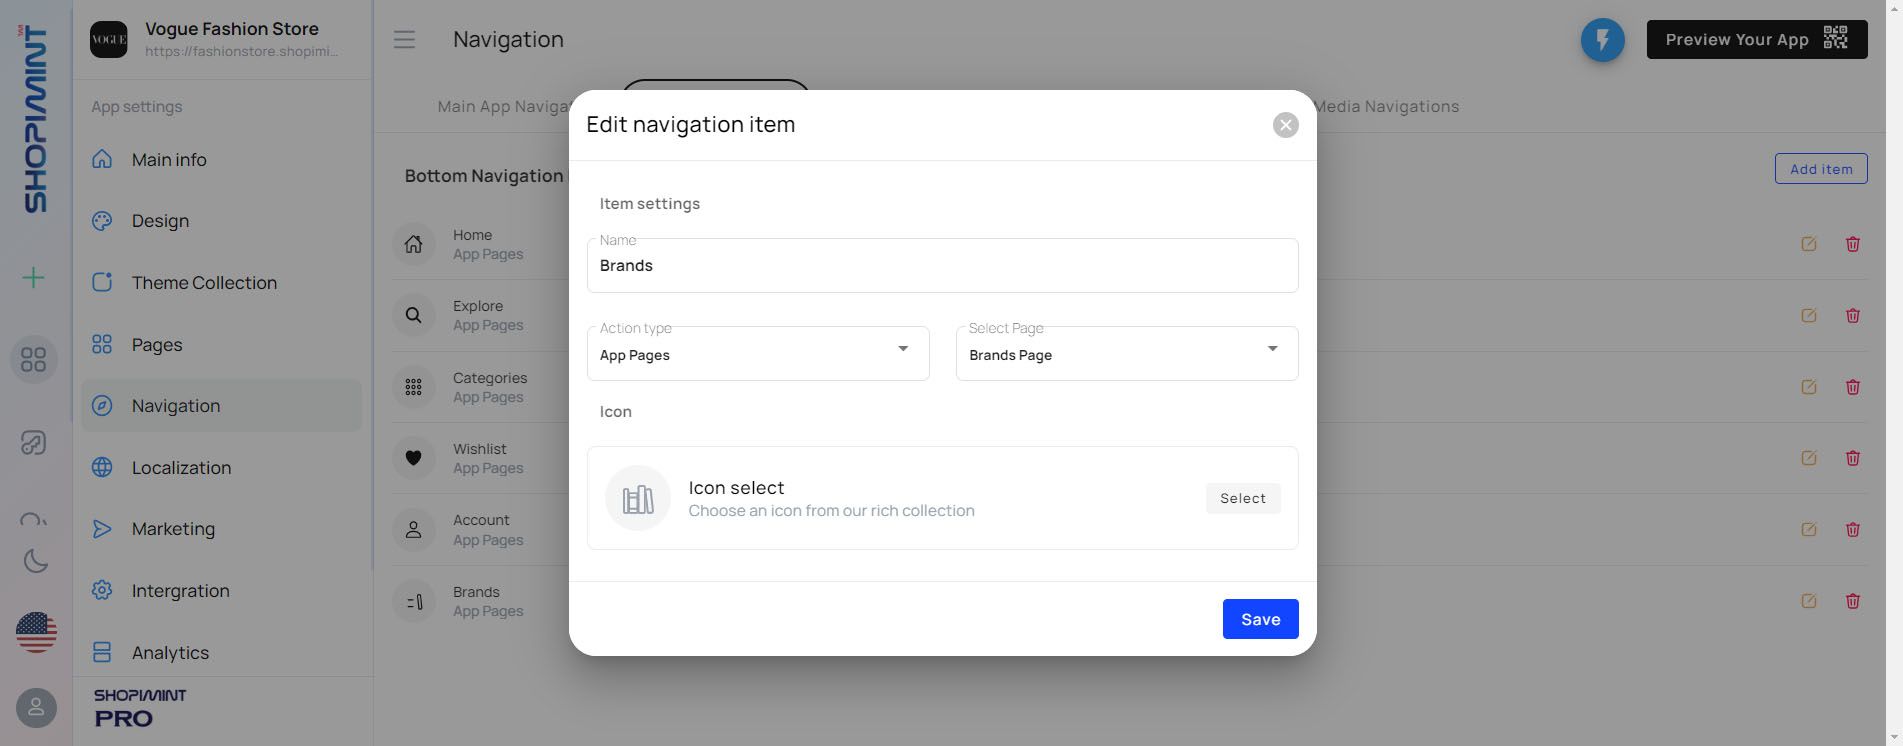
You can edit the details entered using this method. You can delete the inserted item by clicking the 🗑️ icon.
Please make sure to press the Save Changes button to save the changes .
03. Top Right Bar Buttons
Add New Item
You can add a new item on Top Right Bar Buttons from Navigation ➝ Top Right Bar Buttons➝ Add Item ➝ New Navigation Item

| Option | Description |
|---|---|
| (I) Name | You can add a desired name to a new navigation item in the "Name" text field for the app display. |
| (II) Action Type | Select the correct action type from the box. |
| (III) Select Page | Select the page type or enter the page link for the page type. |
| (IV) Icon | Select an icon for the application display. |
Edit Item
You can edit Top Right Bar Buttons from Navigation ➝ Top Right Bar Buttons➝ Edit Navigation Item
You can edit the details entered using this method. And you can delete the inserted item by clicking the 🗑️ icon.
Please make sure to press the Save Changes button to save the changes .
04. Profile Page Navigation
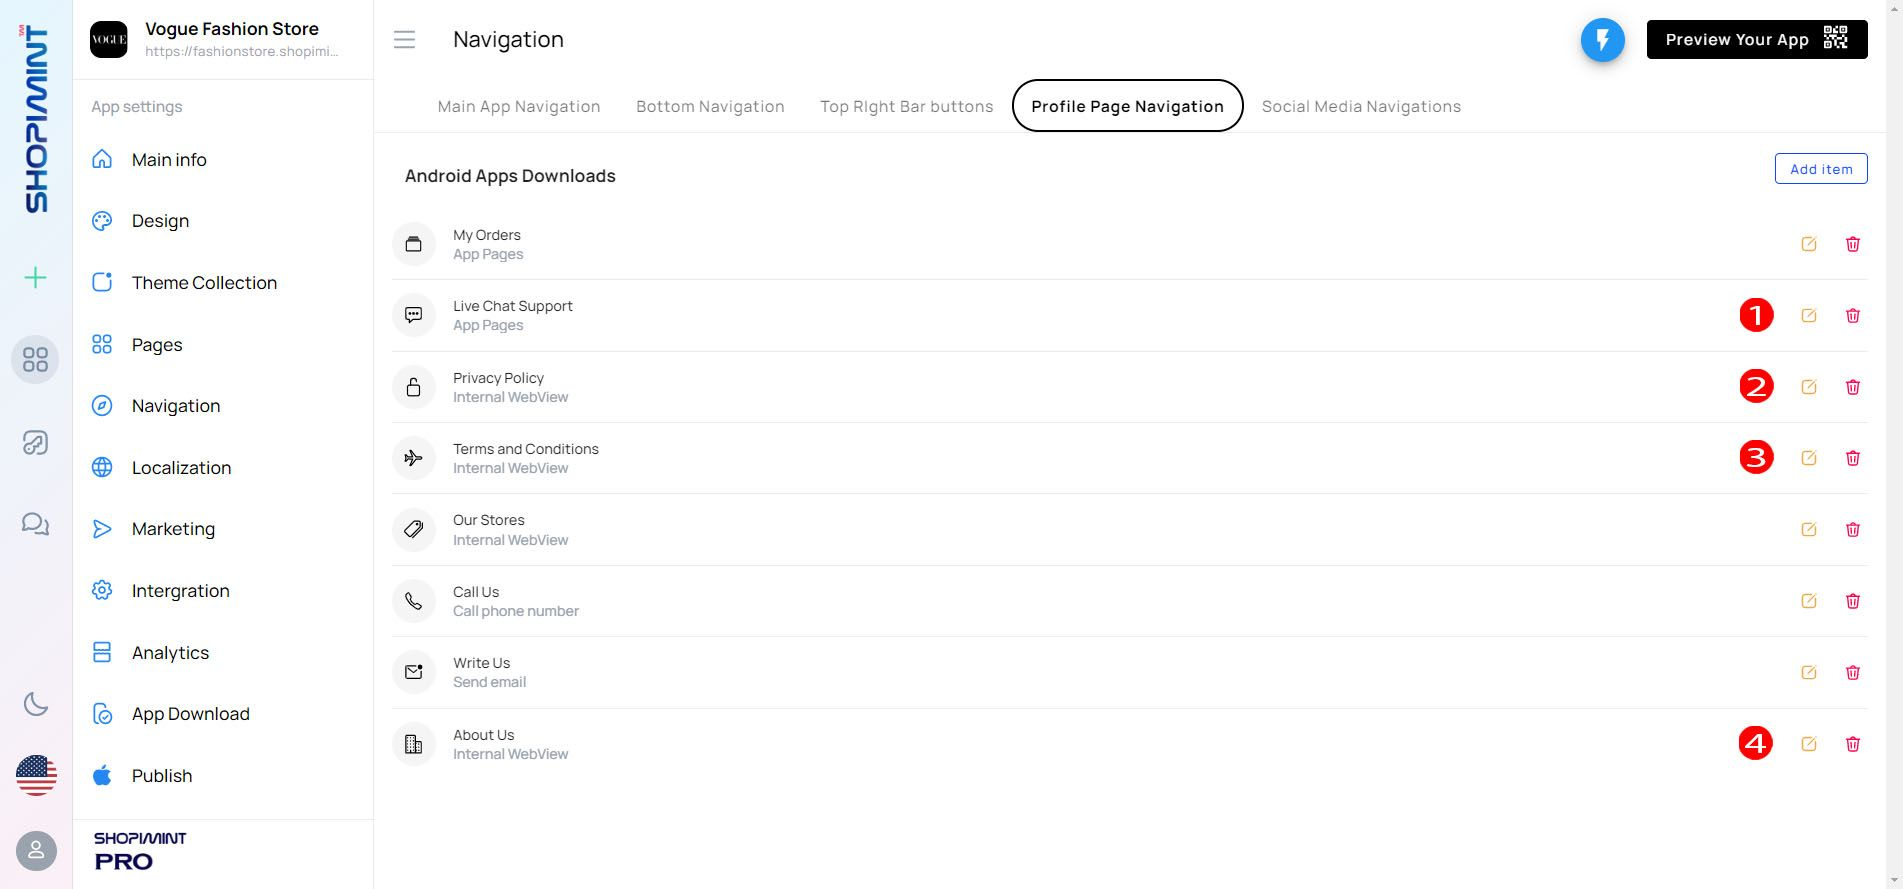
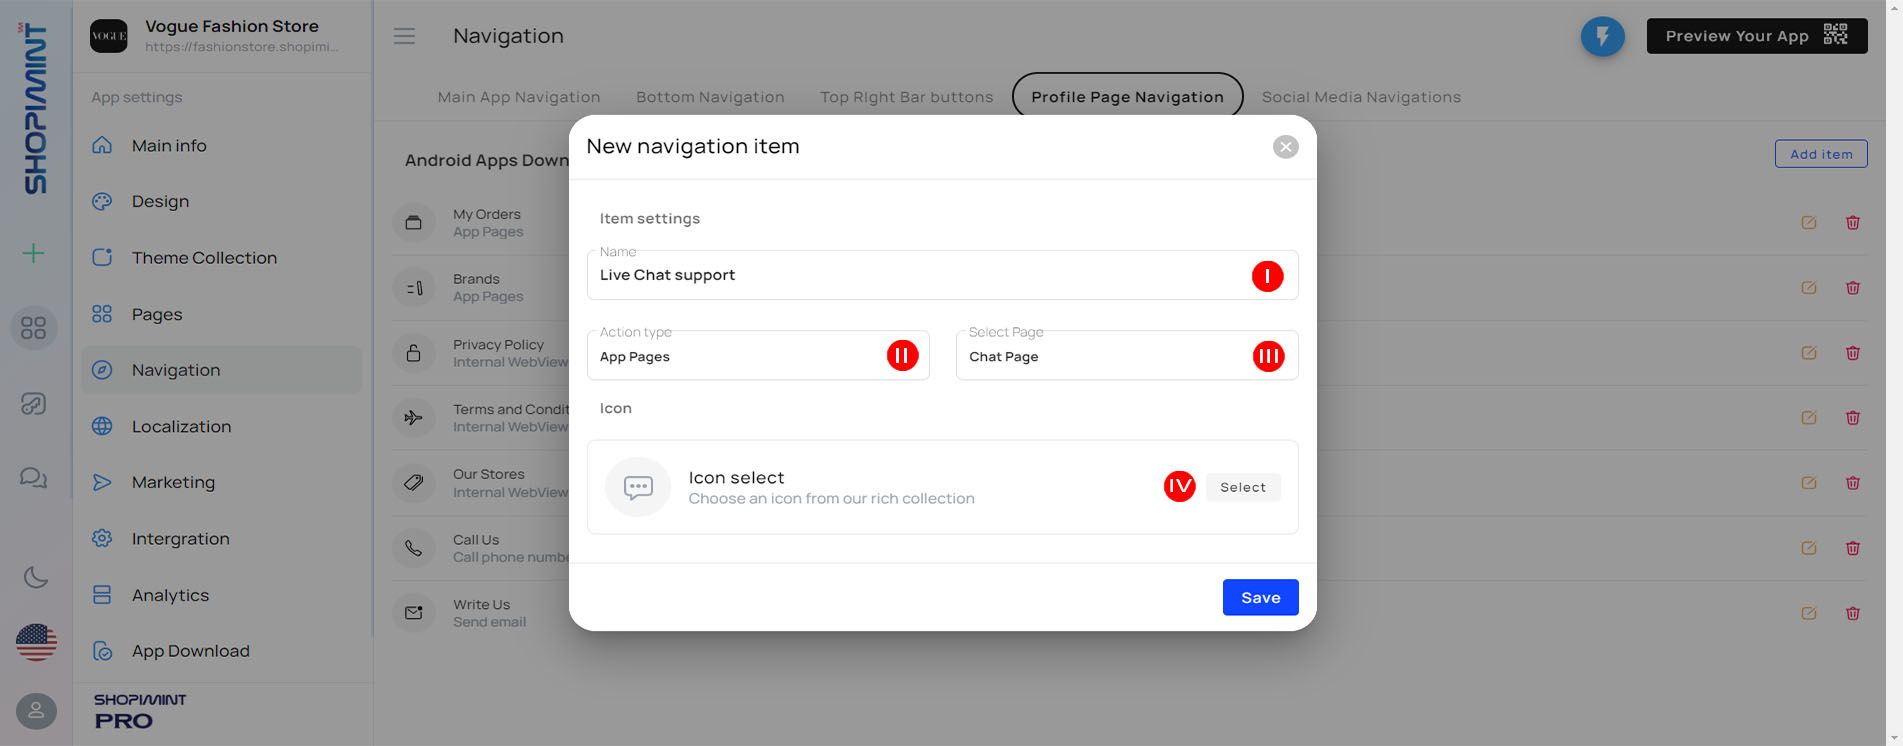
1. Add Live Chat
You can add a Live Chat feature to your app through the Navigation Page. To do that follow these steps.
Navigate to Navigation ➝ Profile Page Navigation ➝ Add Item ➝ New Navigation Item
| Option | Description |
|---|---|
| (I) Name | You can add a desired name to the Live Chat in the "Name" text field for the app display. |
| (II) Action Type | Select "App Pages" for the action type. |
| (III) Select Page | Select "Chat Page" for the page type. |
| (IV) Icon | Select an icon for the application display. |
You can edit the details entered using the same method as above. And you can delete the inserted item by clicking the 🗑️ icon.
There is a special process to enable the live chat feature. How to do it is very clearly stated in another article. So please refer to this article and enable live chat for your app.
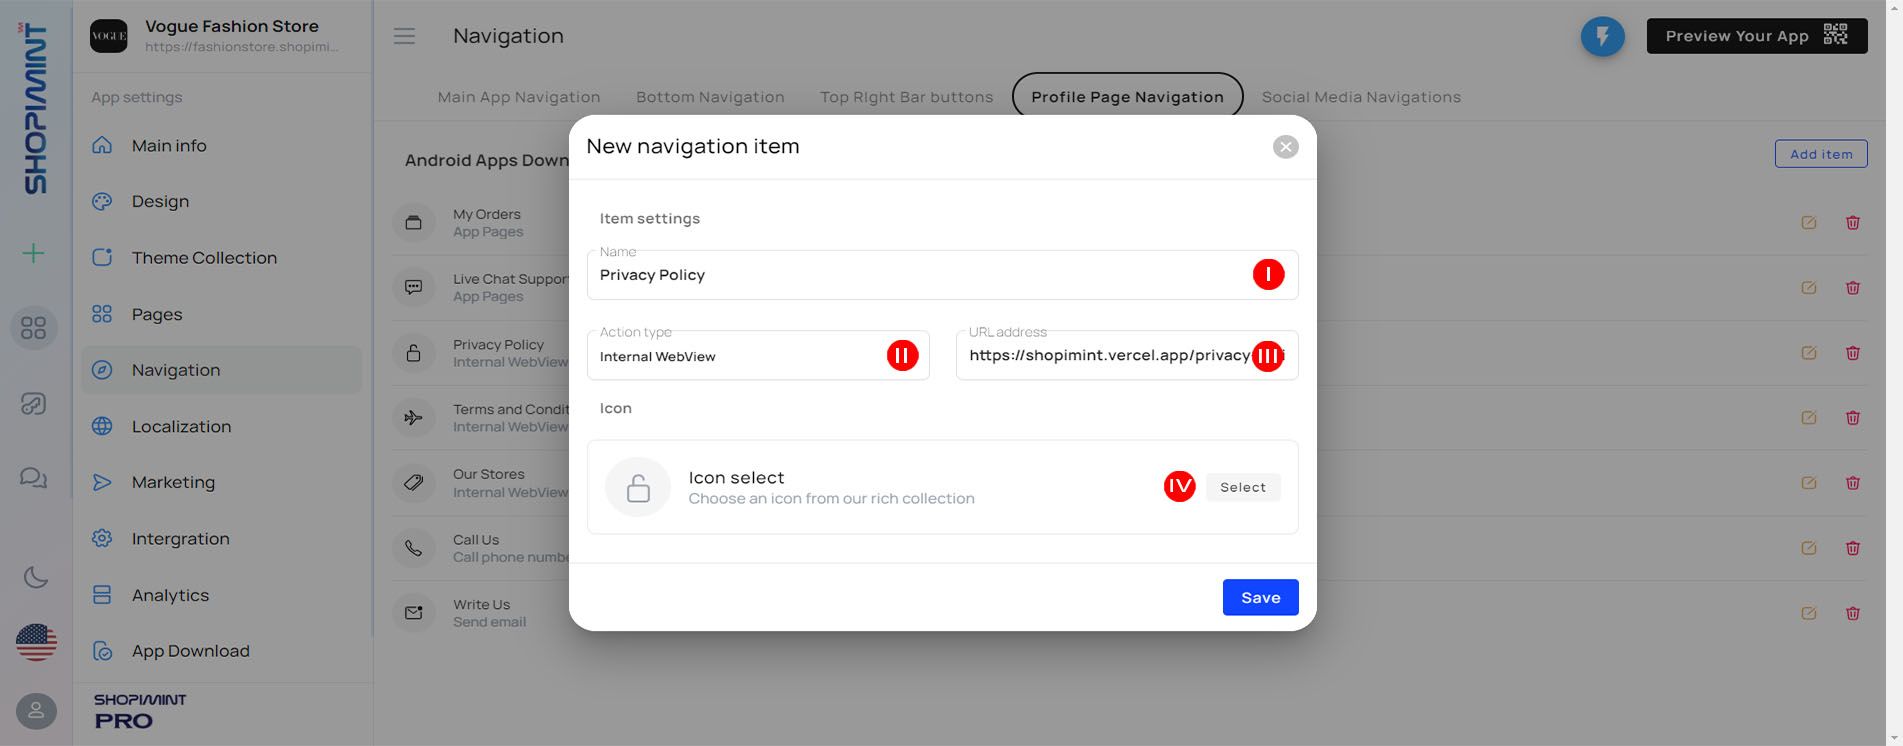
2. Add Privacy Policy Page
You can add a Privacy Policy Page through the Navigation Page. To do that follow these steps.
Navigate to Navigation ➝ Profile Page Navigation ➝ Add Item ➝ New Navigation Item
| Option | Description |
|---|---|
| (I) Name | You can add a desired name to the Privacy Policy page in the "Name" text field for the app display. |
| (II) Action Type | Select "Internal Web View" for the action type as these types of pages act as web views. |
| (III) URL Address | Paste your "Privacy Policy" page link in this area. |
| (IV) Icon | Select an icon for the application display. |
You can edit the details entered using the same method as above. And you can delete the inserted item by clicking the 🗑️ icon.
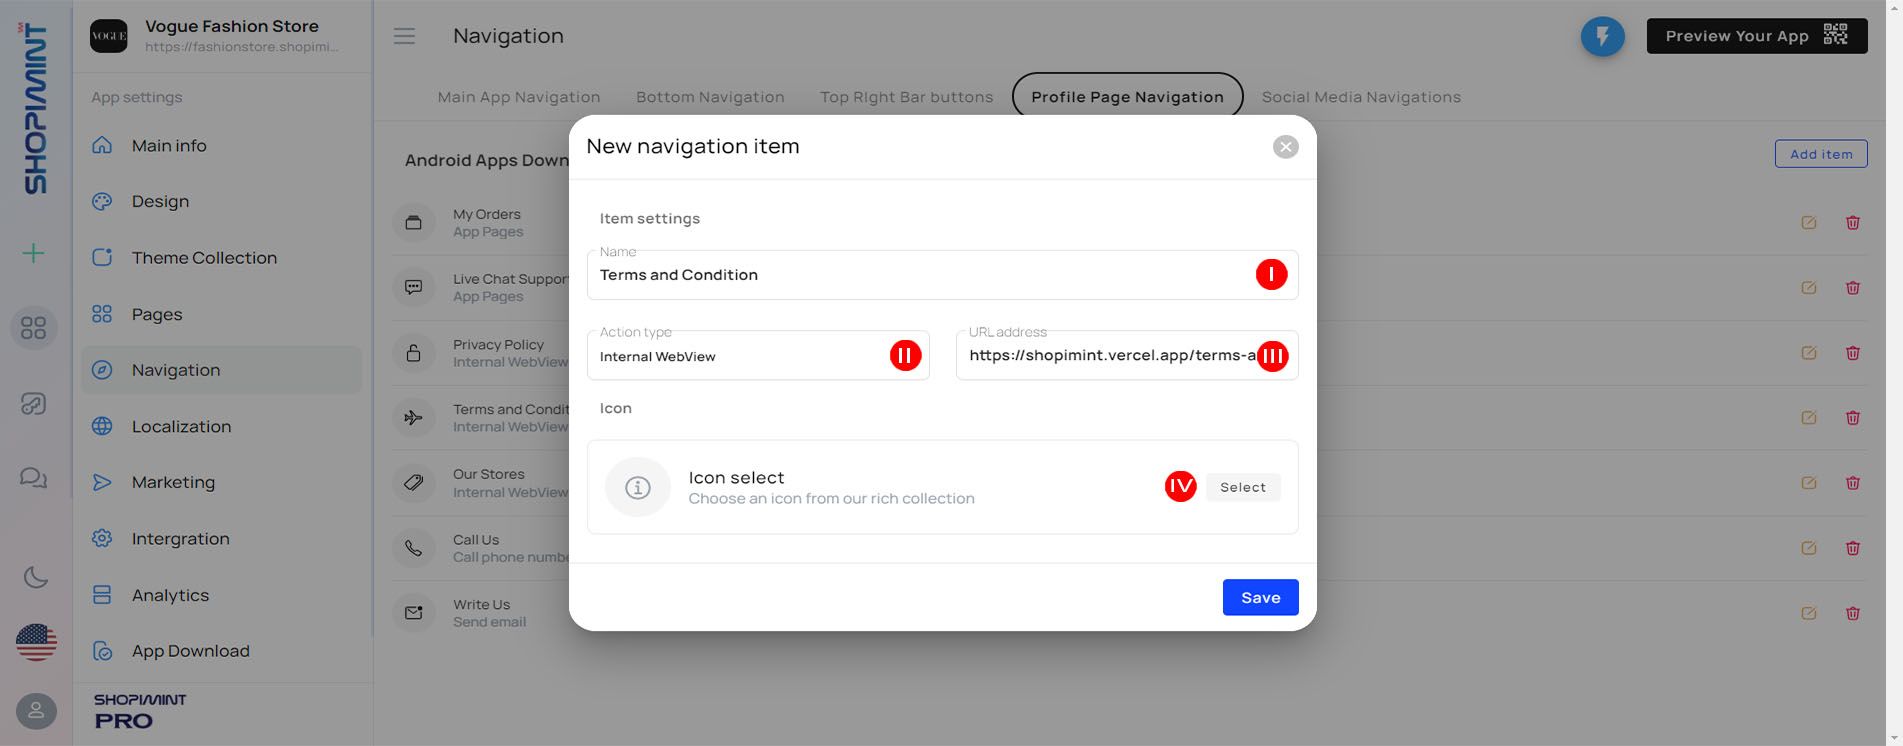
3. Add Terms & Conditions Page
You can add the Terms & Conditions Page through the Navigation Page. To do that follow these steps.
Navigate to Navigation ➝ Profile Page Navigation ➝ Add Item ➝ New Navigation Item
| Option | Description |
|---|---|
| (I) Name | You can add a desired name to the Terms & Conditions page in the "Name" text field for the app display. |
| (II) Action Type | Select "Internal Web View" for the action type as these types of pages act as web views. |
| (III) URL Address | Paste your "Terms & Conditions" page link in this area. |
| (IV) Icon | Select an icon for the application display. |
You can edit the details entered using the same method as above. And you can delete the inserted item by clicking the 🗑️ icon.
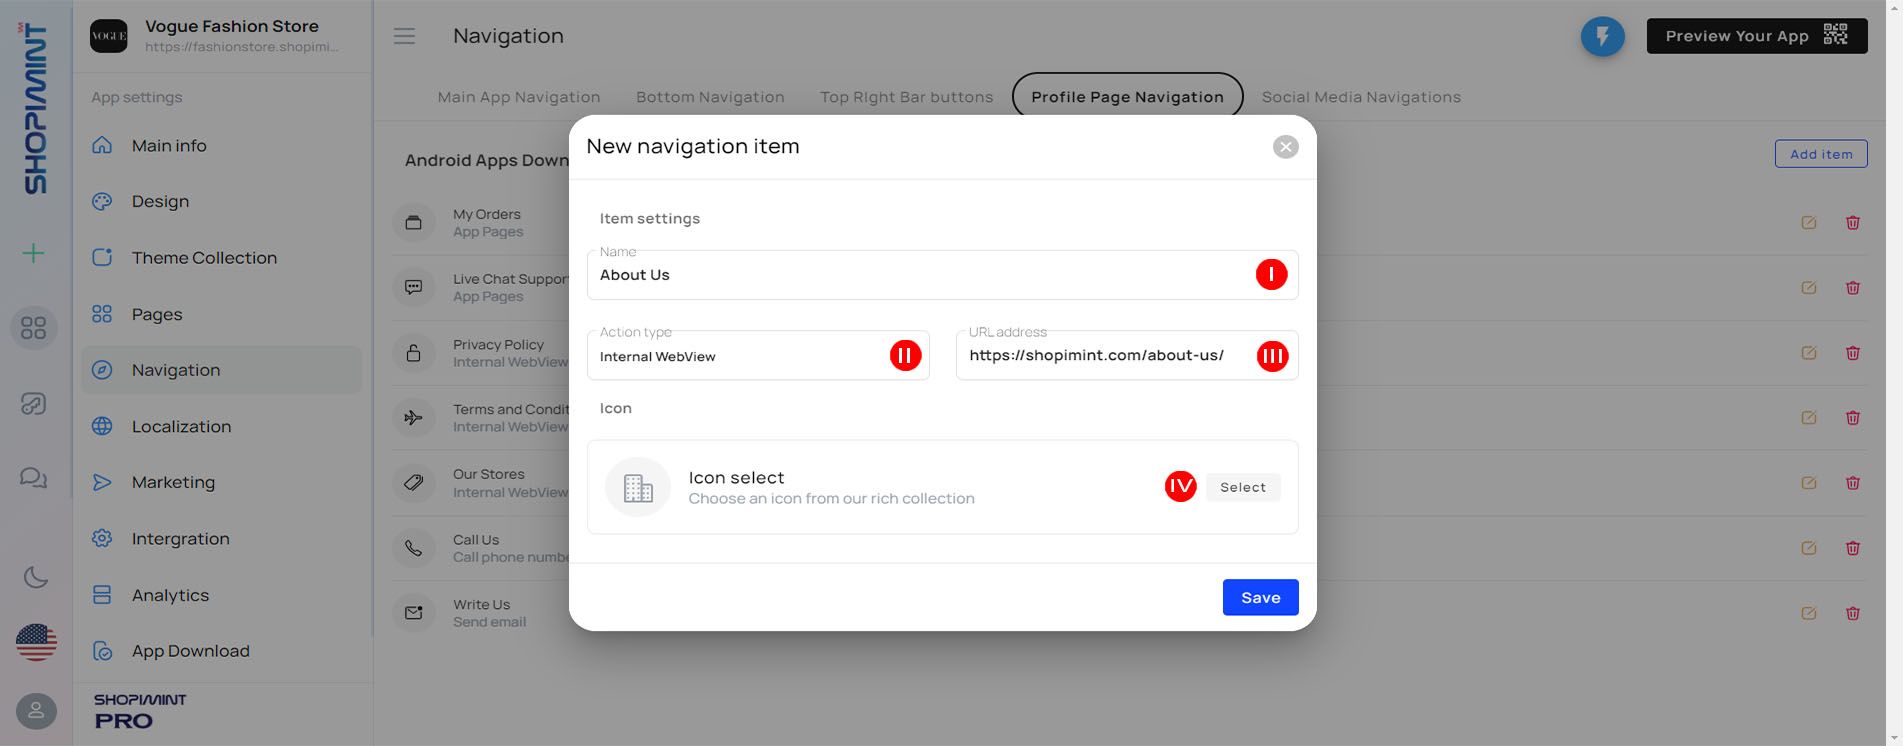
4. Add About Us Page
You can add an About Us Page through the Navigation Page. To do that follow these steps.
Navigate to Navigation ➝ Profile Page Navigation ➝ Add Item ➝ New Navigation Item
| Option | Description |
|---|---|
| (I) Name | You can add a desired name to the About Us page in the "Name" text field for the app display. |
| (II) Action Type | Select "Internal Web View" for the action type as these types of pages act as web views. |
| (III) URL Address | Paste your "About Us" page link in this area. |
| (IV) Icon | Select an icon for the application display. |
You can edit the details entered using the same method as above. And you can delete the inserted item by clicking the 🗑️ icon.
Please make sure to press the Save Changes button to save the changes .
05. Social Media Navigation
You can add social media links to your app from Navigation ➝ Social Media Navigation
You need to toggle the toggle button to enable your social media.
After enabling the toggle button you can add your social media link to the relevant category.

Please make sure to press the Save Changes button to save the changes .