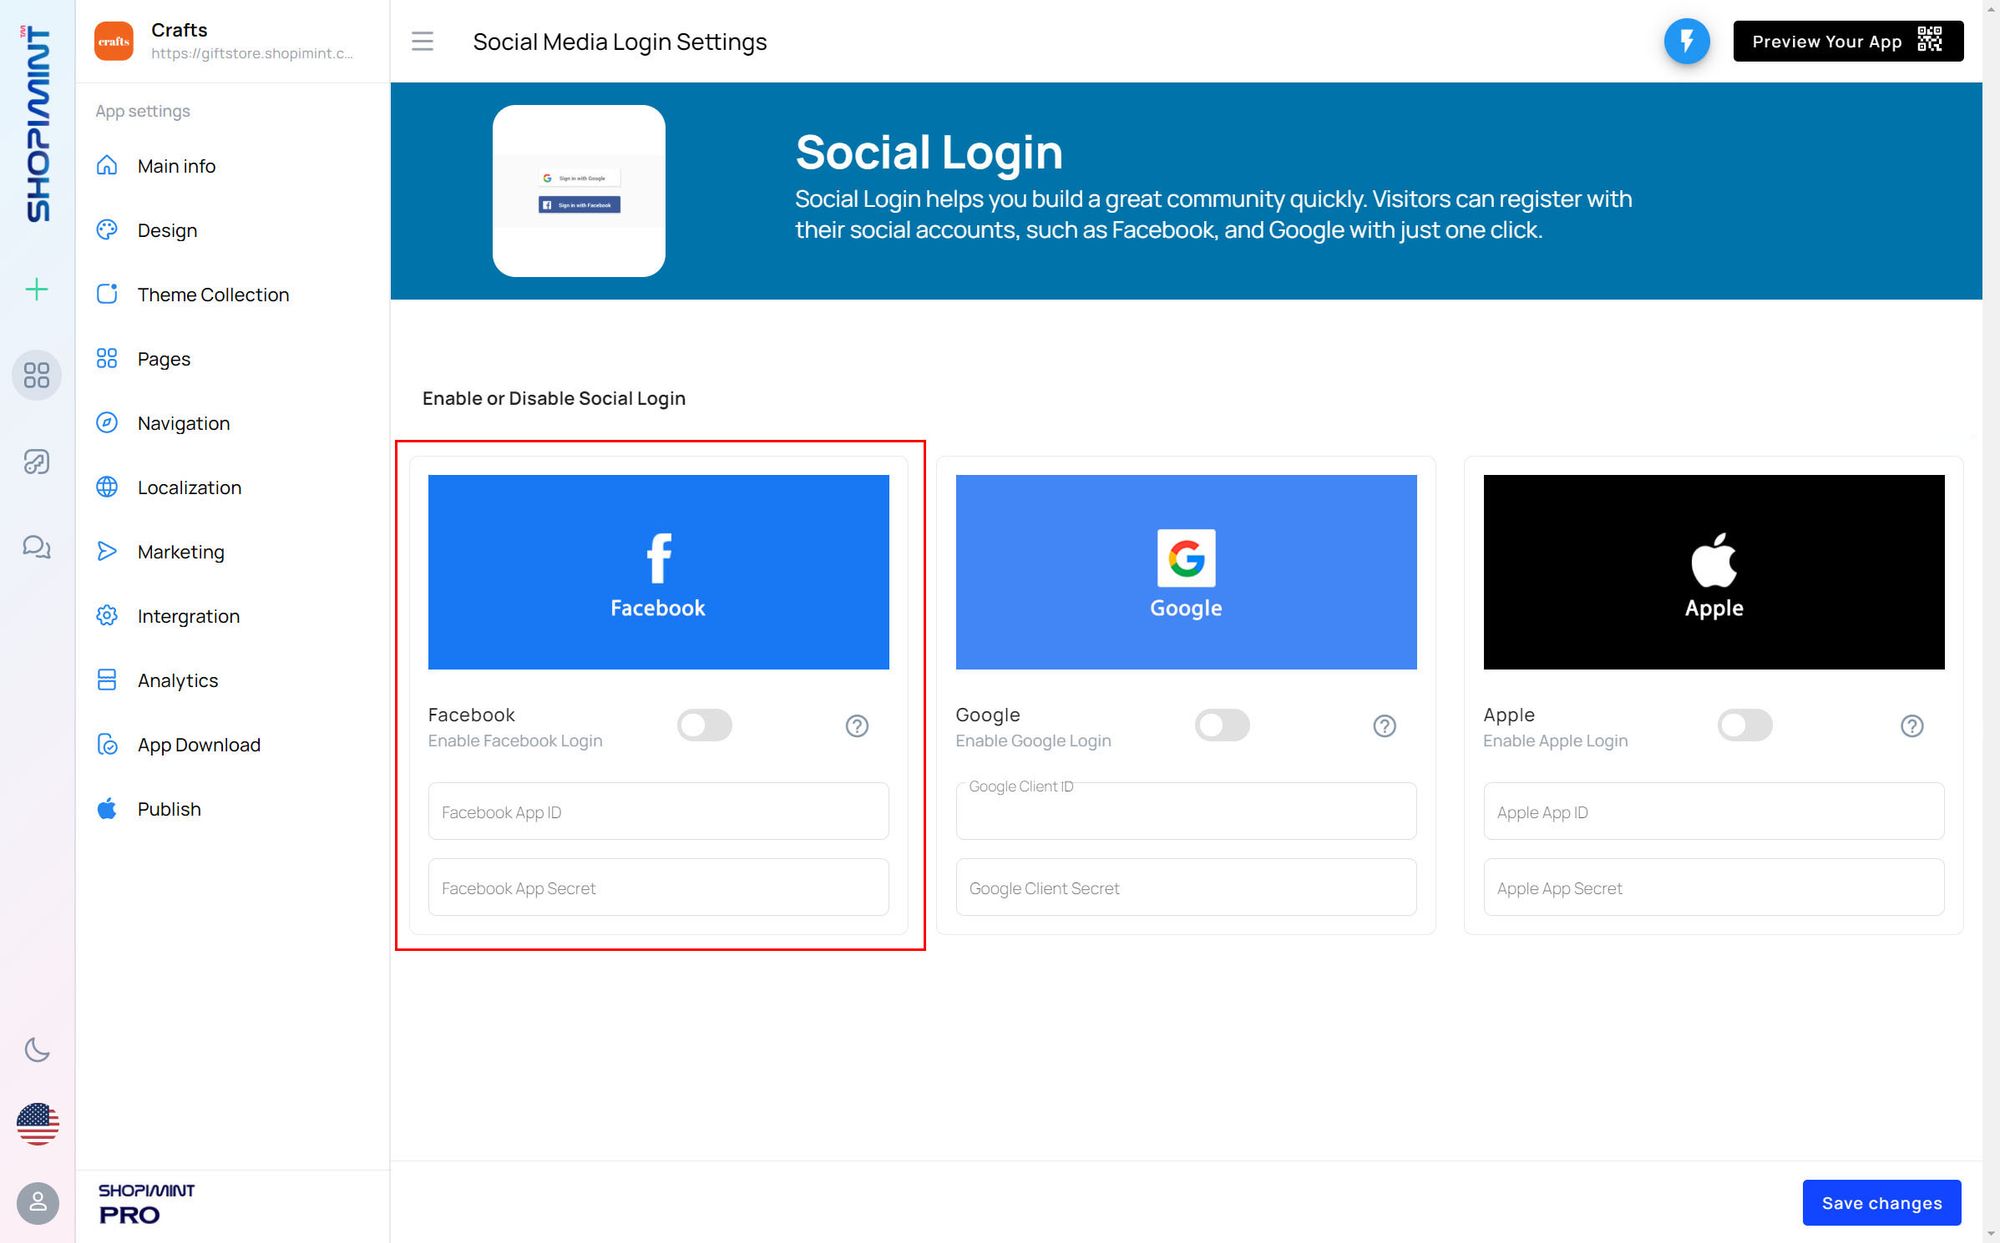
How to enable Facebook login ?

Step 1. Enable Facebook Login for your app
You can Enable Facebook Login by toggling the button. You can do it from Integration ➝ All ➝ Social Login ➝ Social Media Login Settings ➝ Facebook
Full guide to enable Facebook login in Shopimint
How to enable Facebook login in Shopimint
1. Create a Facebook App
To be able to log in via Facebook you must create a Facebook app first.
- Navigate to https://developers.facebook.com/apps/
- Log in with your Facebook credentials if you are not logged in.
- Click on the “Create App” button and in the Popup choose the “Consumer” App type!
- If you see the message “Become a Facebook Developer”, then you need to click on the green “Register Now” button, fill out the form then finally verify your account.
- Fill in “App Display Name”, and “App Contact Email”. The specified “App Display Name” will appear on your Consent Screen!
- Optional: choose a “Business Manager Account” in the popup, if you have any.
- Click the “Create App” button and complete the Security Check.
- Find “Facebook Login” and click “Set Up”.
- Select “Web” and into the “Site URL” field you should enter the value that Shopimint Social Login suggests.
- Press “Save”.
- Click on the “Settings” option that you find on the left side, under “Products – Facebook Login”
- Into the “Valid OAuth redirect URIs” field you should add the URL that Shopimint Social Login suggests.
- Click on “Save Changes”.
- On the top left side, click on the “Settings” menu point, then click “Basic”.
- Enter your domain name in the “App Domains” field.
- Fill up the “Privacy Policy URL” field. Provide a publicly available and easily accessible privacy policy that explains what data you are collecting and how you will use that data.
- At “User Data Deletion”, choose the “Data Deletion Instructions URL” option, and enter the URL of your page* with the instructions on how users can delete their accounts on your site.
To comply with GDPR, you should already offer the possibility to delete accounts on your site, either by the user or by the admin:- If each user has an option to delete the account: the URL should point to a guide showing the way users can delete their accounts.
- If the accounts are deleted by an admin: then you should have a section – usually in the Privacy Policy – with the contact details, where users can send their account erasure requests. In this case, the URL should point to this section of the document.
- Select a “Category”, an “App Icon” and pick the “App Purpose” option that describes your App the best, then press “Save Changes”.
- Your application is currently private, which means that only you can log in with it. In the top bar switch the “App Mode” from “Development” to “Live”.
- By default, your application only has Standard access for the permissions, which is not enough for Facebook Login.
On the left side, click on App Review then click Permissions and Features. In the table, you will find the “public_profile” and “email” permissions and you should click on the Get Advanced Access buttons next to them. - On the top left side, click on the “Settings” menu point, then click “Basic”.
- At the top of the page, you can find your “App ID” and you can see your “App secret” if you click on the “Show” button. These will be needed in the plugin’s settings.
2. App setup
Once your Facebook app is ready you’ll need to copy and paste the App ID and App secret to the Facebook provider’s Settings tab. You can find the information at your Facebook app’s Settings which you can reach from the left sidebar.
3. Verifying
Once your App ID and App secret have been added you need to verify the setup first. This verification helps you identify possible problems with the app.
Please make sure to press the Save Changes button to save the changes.