How to generate a Provisioning Profile ?
This guide provides steps for generating a Provisioning Profile for Image Notification Service.
Step 1. Generate Identifier
Apple Developer Member Center
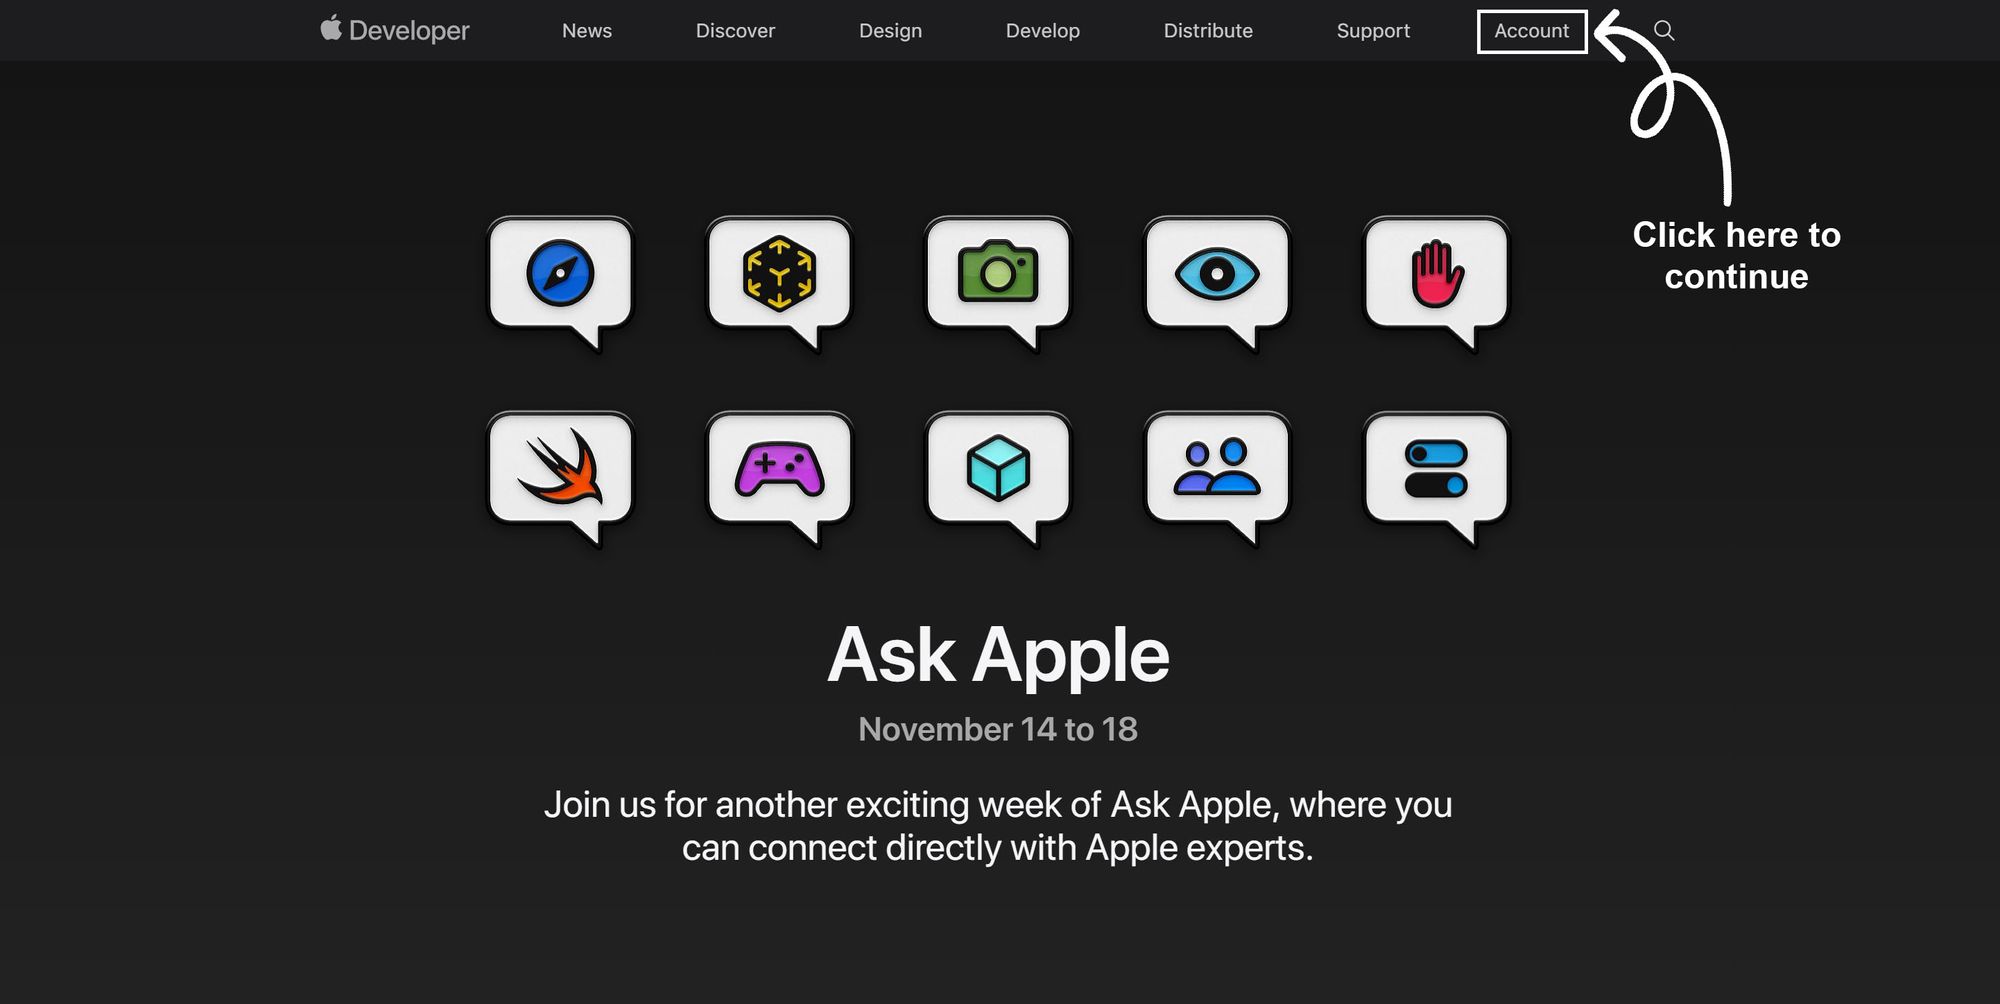
To begin, visit the Apple Developer Member Center and log in with your credentials.
Click the Account button on the top right.
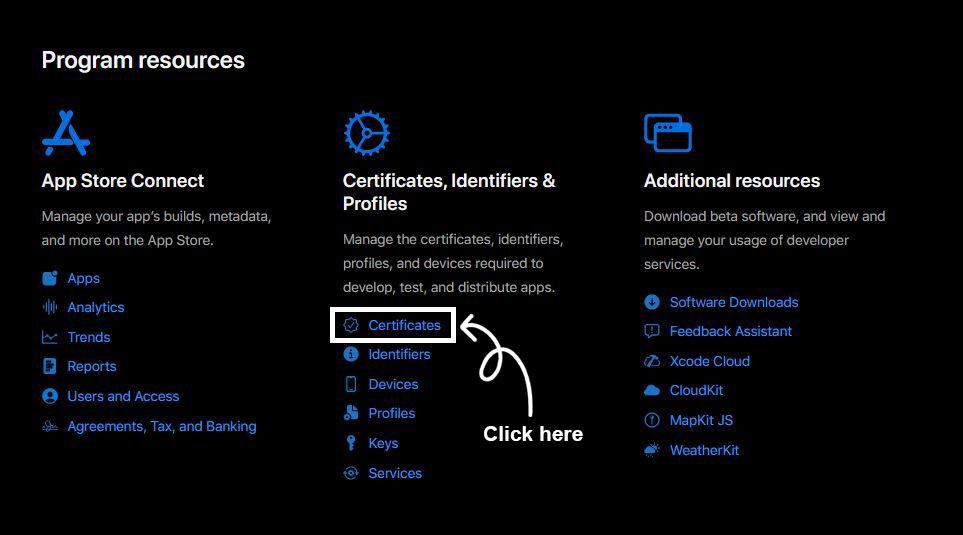
After that, click Certificates from the Certificates, Identifiers & Profiles section, Mentioned in the screenshot below.
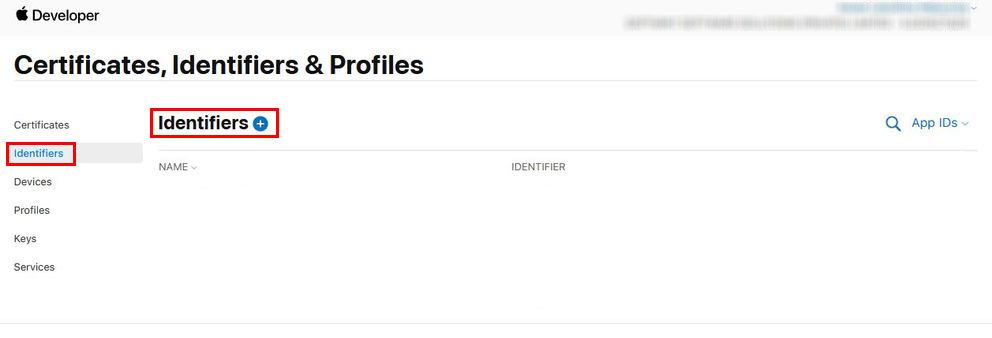
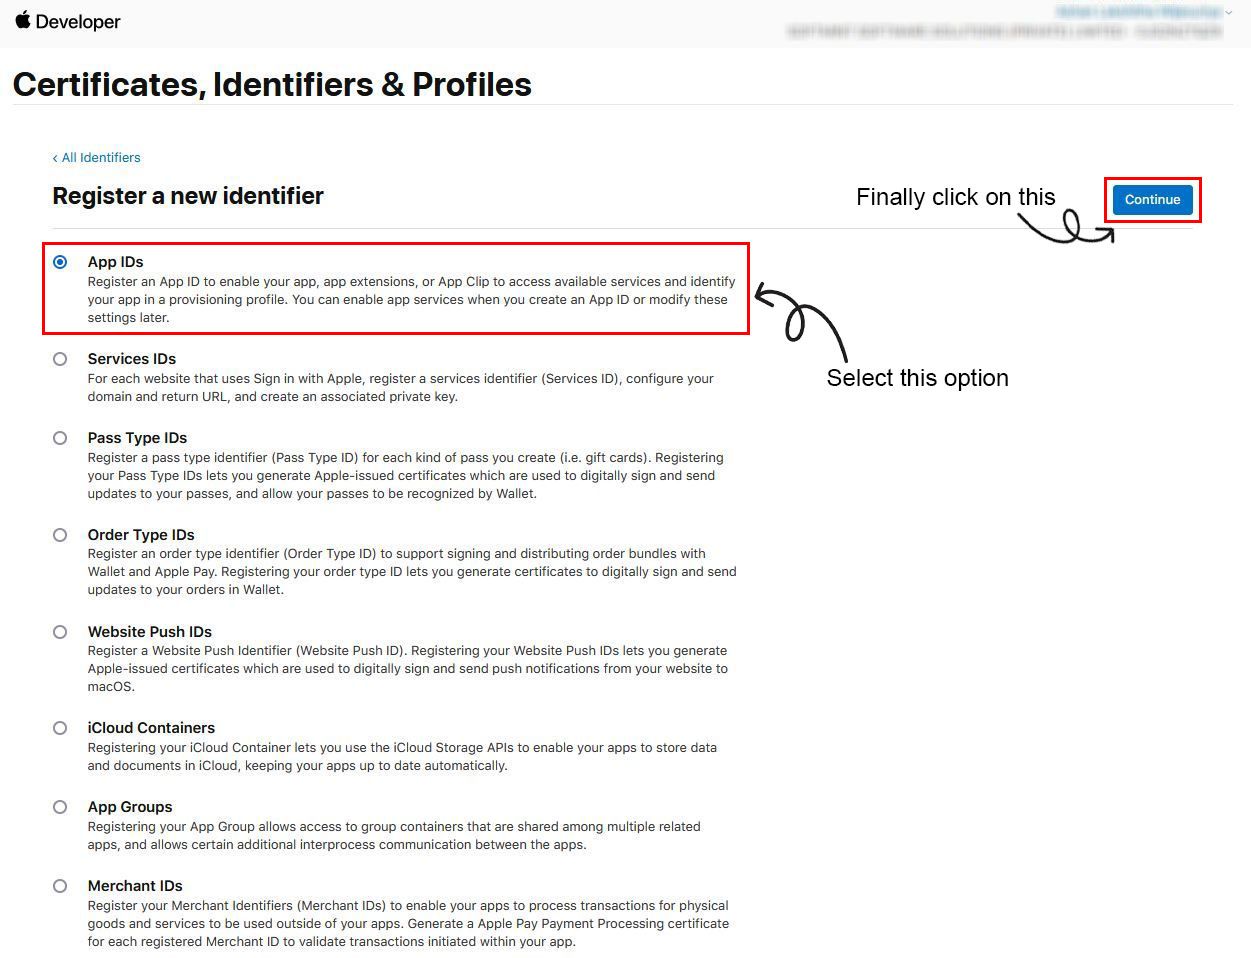
Next, select the Identifiers button from the left panel and click on the Blue Plus (+) icon for the next step.
Now, select the App Ids option from the list on the next page and press the Continue button on the top-right.
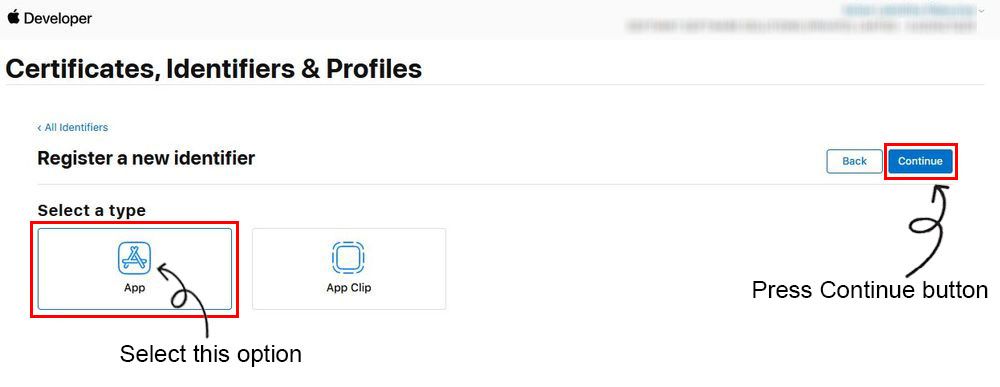
Then, select the App option as a type and press the Continue button on the top-right of the page.
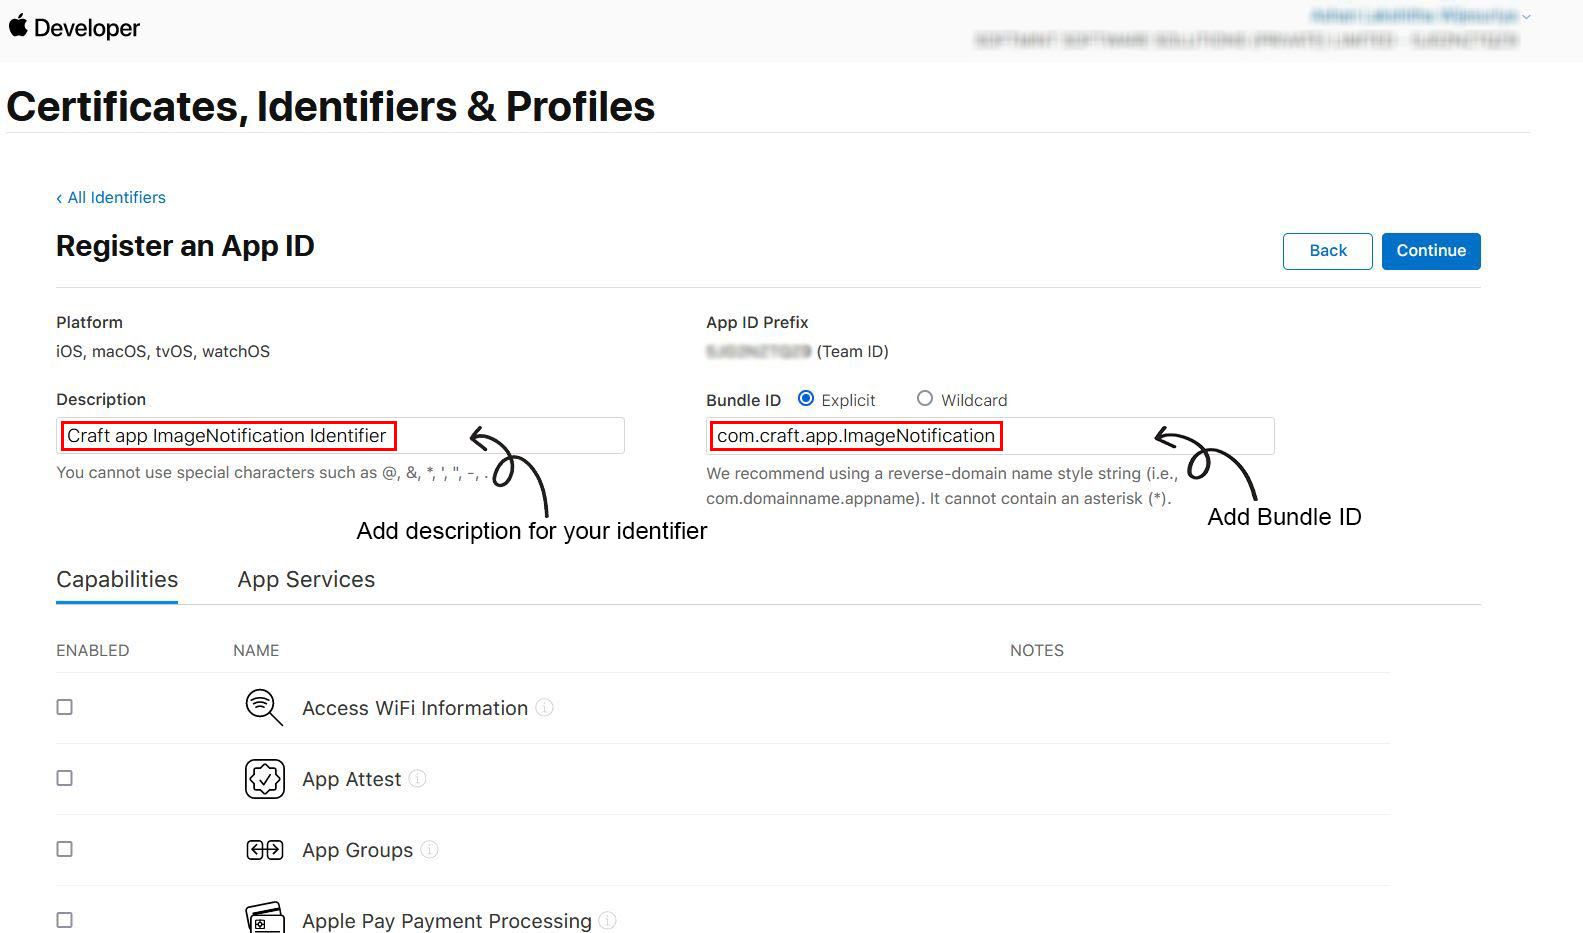
The next step is to Register an App ID for your app. To do that add Description for your Identifier. Then add <app id>.ImageNotification (eg: com.craft.app.ImageNotification) for Bundle ID. Mentioned in the screenshot below.
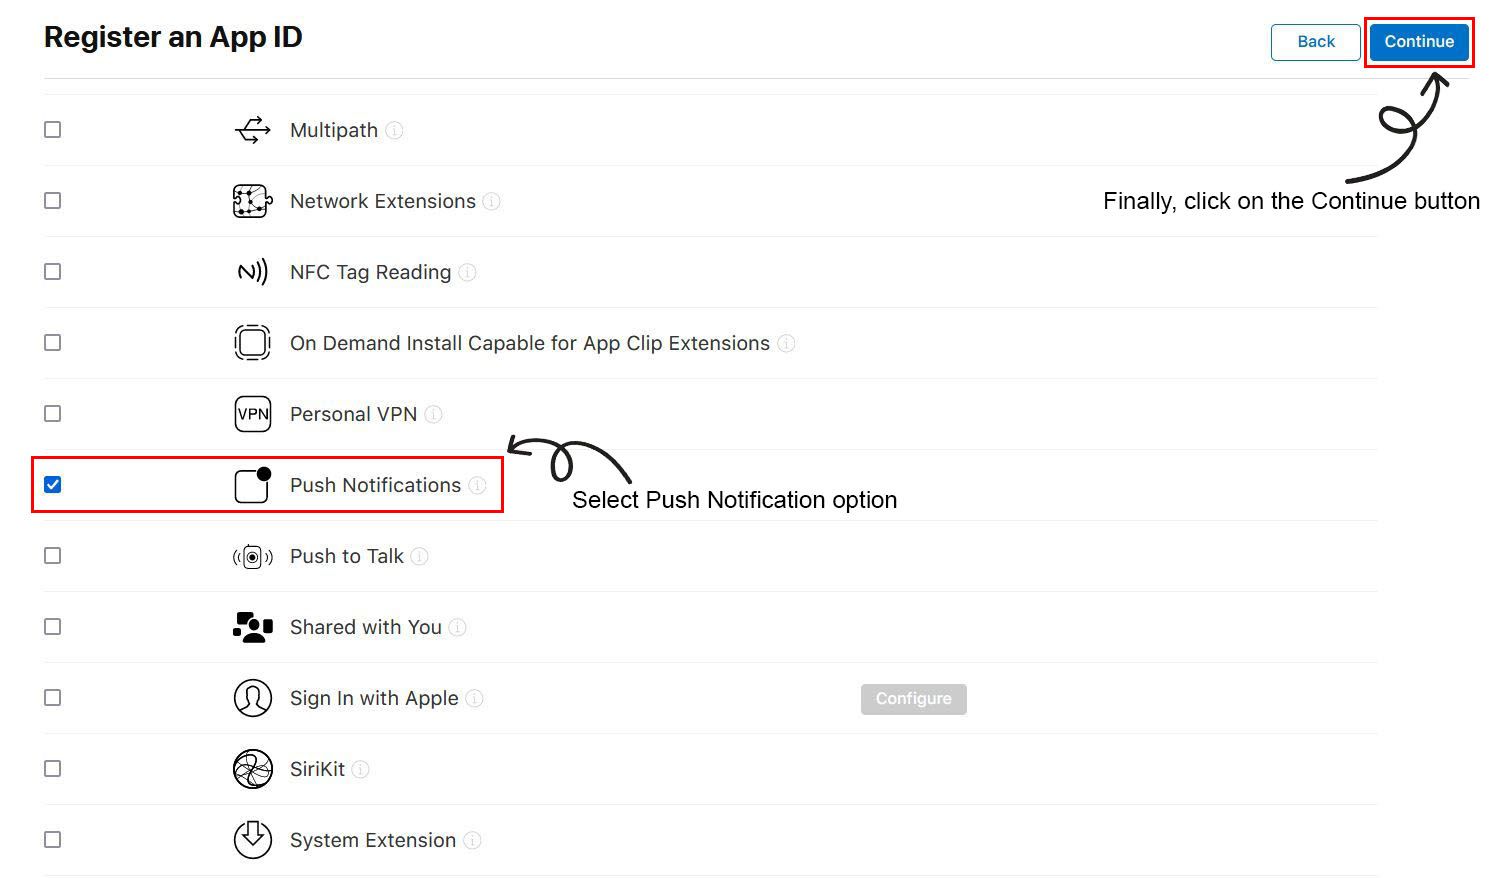
Then, scroll down the page, select the Push Notifications option from Capabilities and press the Continue button to move into the next step. Please check the screenshot below.
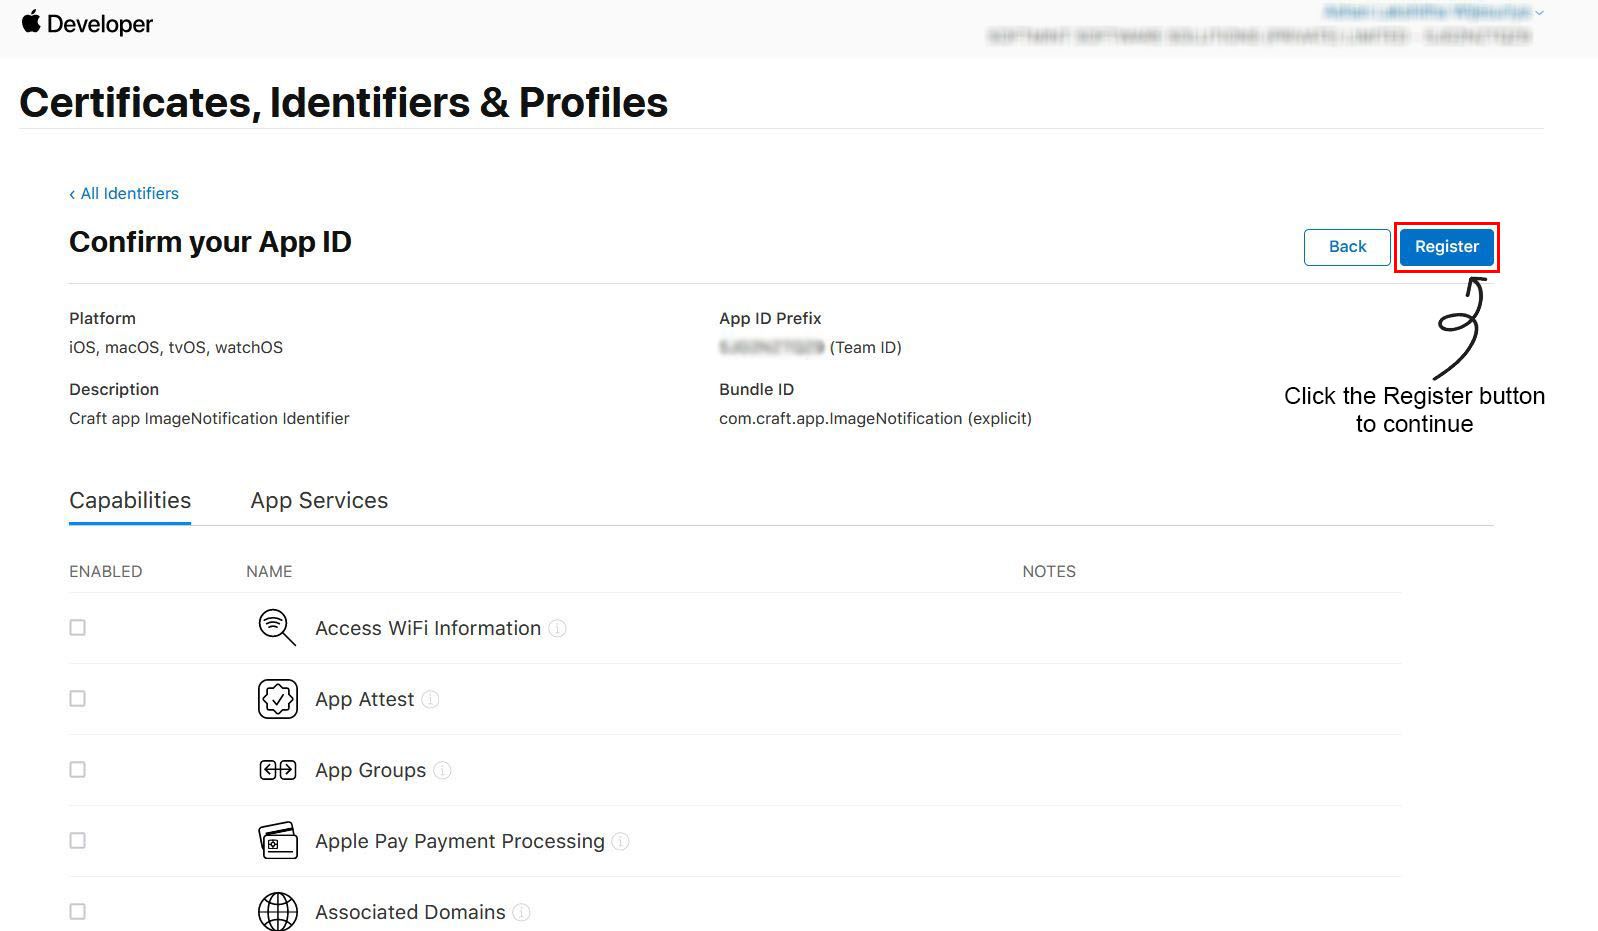
You will now see a preview containing the information you entered in the above steps. After verifying that the information contained there is correct; press the Register button on the top-right corner of the page.
Step 2. Generating Profile using created Identifier
Apple Developer Member Center
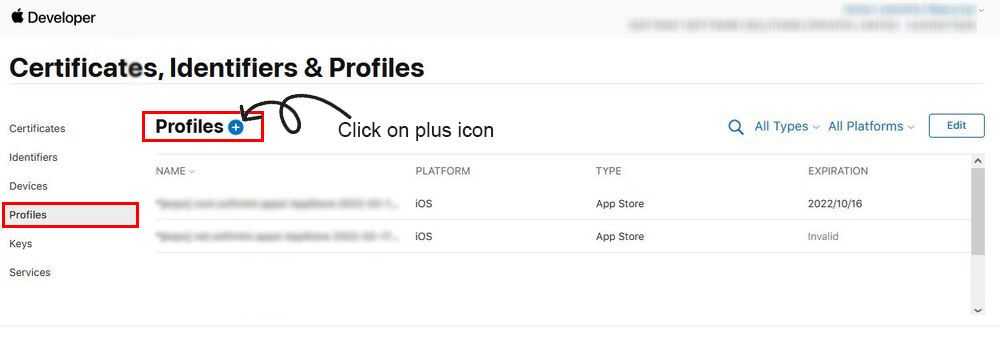
Click on the Profiles button on the left menu list (Please see the screenshot attached below).
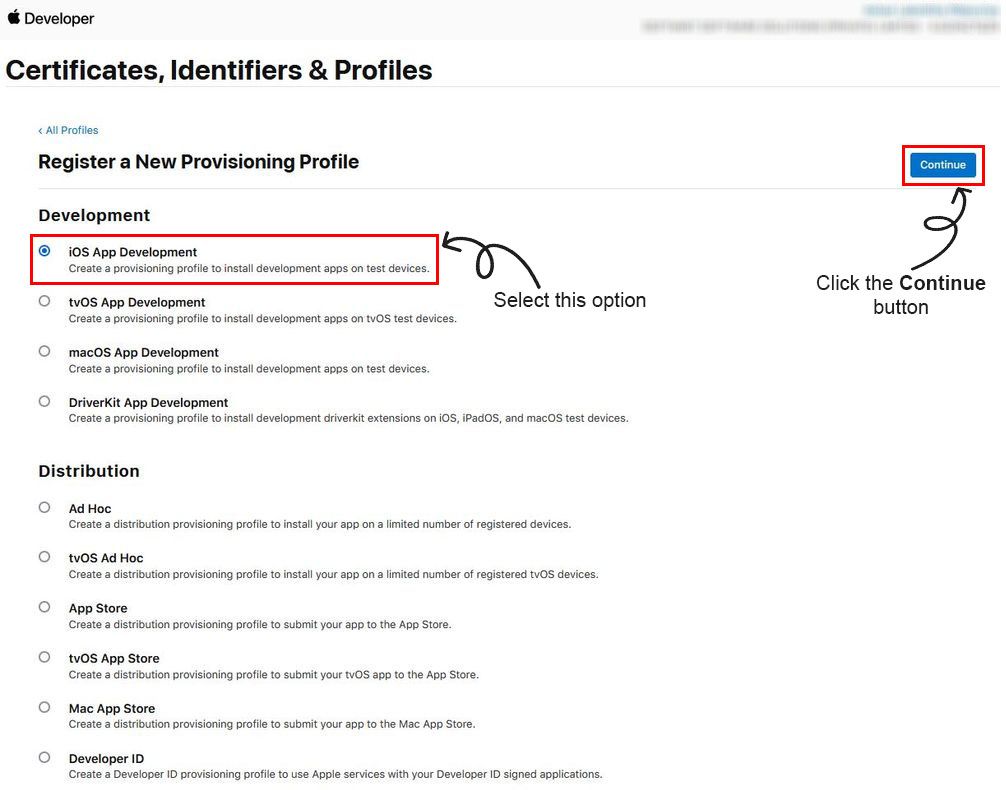
Then click the Blue plus (+) icon next to the Profiles text. After clicking on that you will navigate to the next page. On that page, you can see a list of options for selecting. Now, select the iOS App Development option from the list and press the Continue button for the next step.
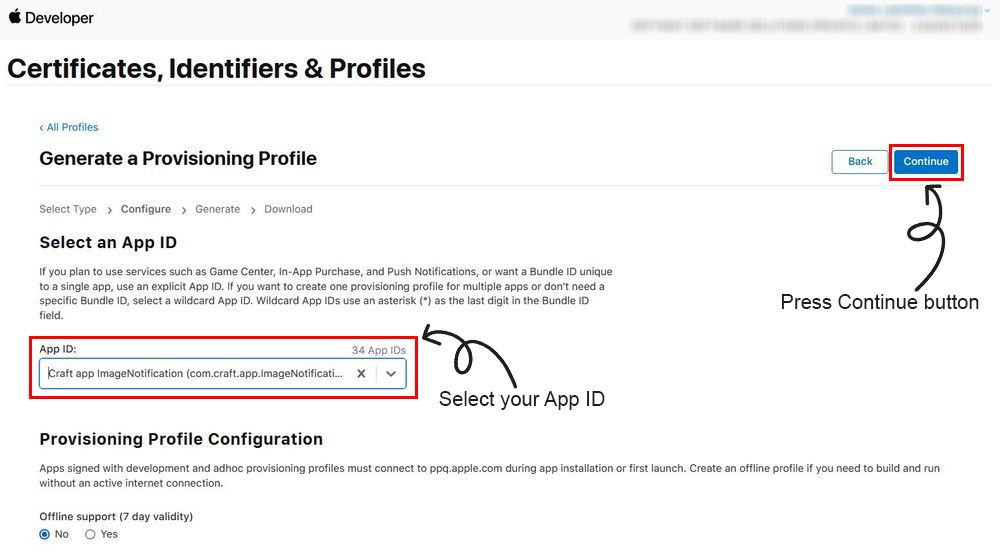
On the next page, you can see a button for selecting your App ID, click on it and select the App ID that you created in the above step (Eg: <your-app-id>.ImageNotification) from the drop-down list (Mentioned in the screenshot below).
Then, press the Continue button. On the next page, you have to select the certificates you wish to include in this provisioning profile. To do that you must select one or more profiles from that list. After you do that press the Continue button to move to the next page. Below you can see a screenshot of these steps completed correctly.

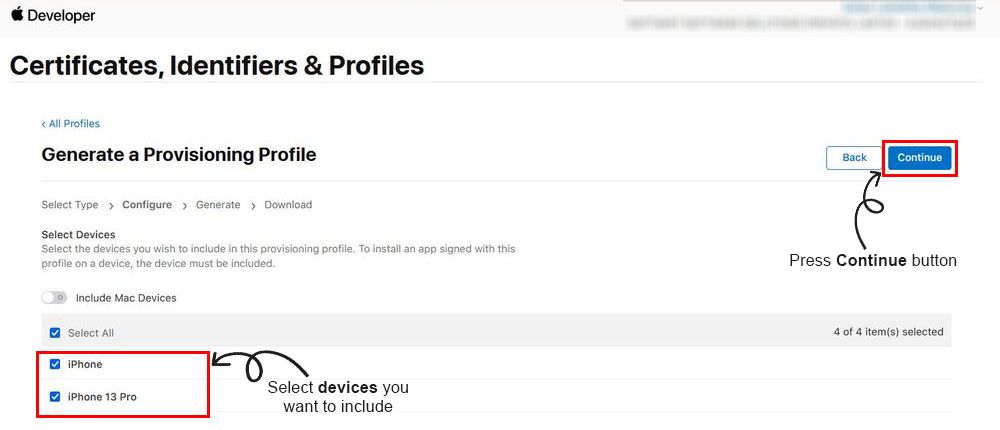
Next, you have to select the devices you wish to include in this provisioning profile. For that, select the devices you need as per the above steps and press the Continue button on the top right side. Below you can see a screenshot of these steps completed correctly.
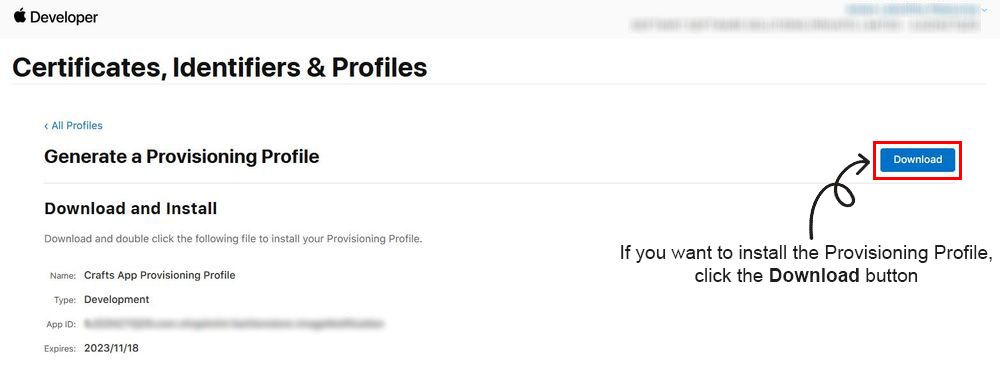
Now you are in the final step of Generating a Provisioning Profile. For generating it you need to add Provisioning Profile Name. It should be entered as shown in the photo below.
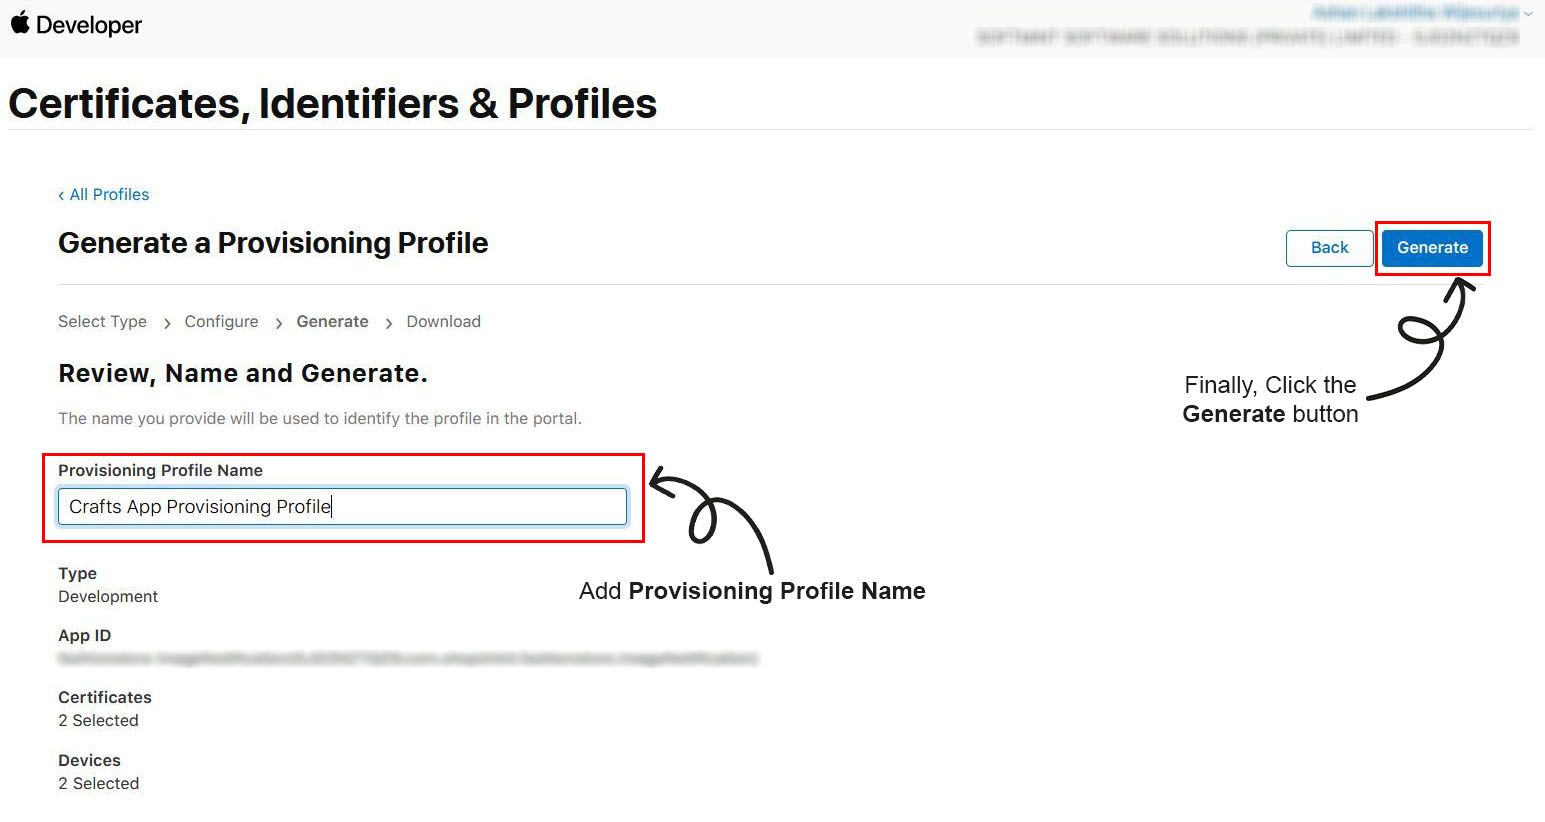
Finally, press the Generate button in the top right corner to generate a Provisioning Profile. After generating completed you can see a Download button in the top-right corner. Click on that to download the profile if you need it.