How to integrate firebase to Shopimint ?
Step 1: Create a Firebase project
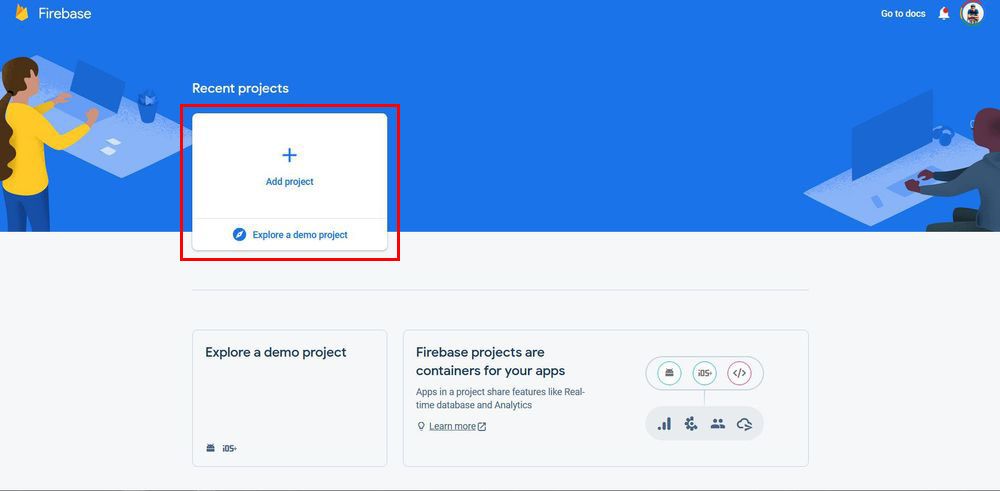
Before you can add Firebase to your Android app, you need to create a Firebase project to connect to your Android app / iOS. To do that visit https://firebase.google.com/

Step 2: Create a new project
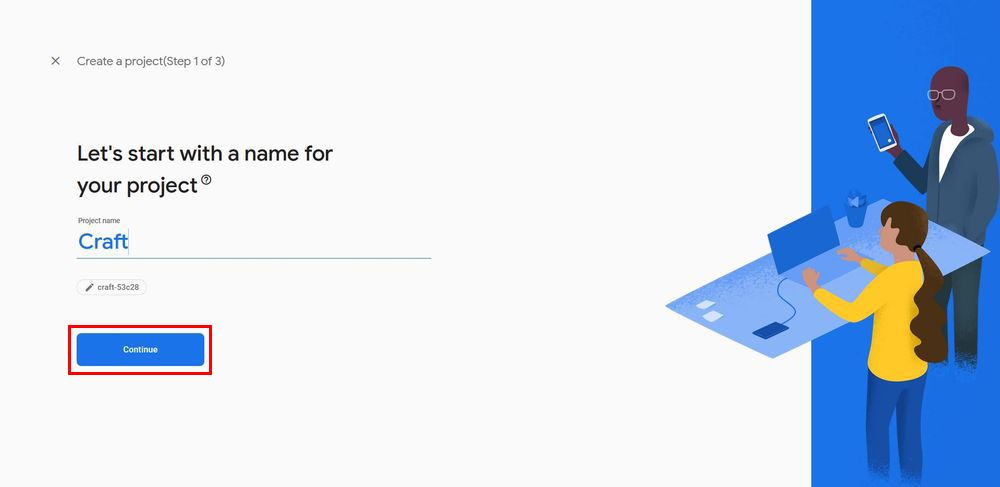
To create a new project, click on the Add Project button. After making a new project, enter the name of the project and click continue.
Step 3: Enable Google Analytics for the project
Make sure you have enabled Google Analytics for the project and press continue.

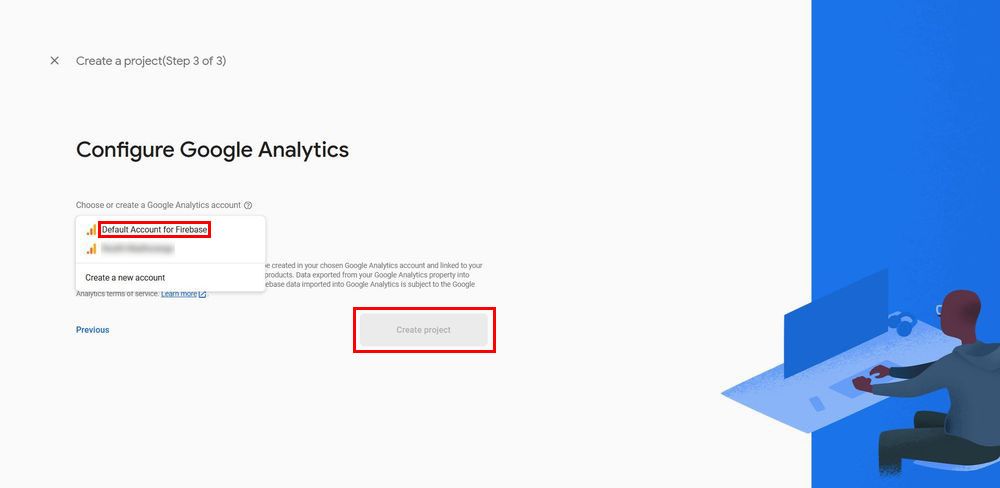
Step 4: Select an account for Google Analytics
In this step, you will be prompted to either select or create a Google Analytics Account. If you already have a Google Analytics account, click on Select Google Account and select the account. If you don't have a Google Analytics account, Select Default Account for the Firebase option and click the Create Project button.
The process should take just a few seconds, once done click continue and you will be taken to the project's homepage.
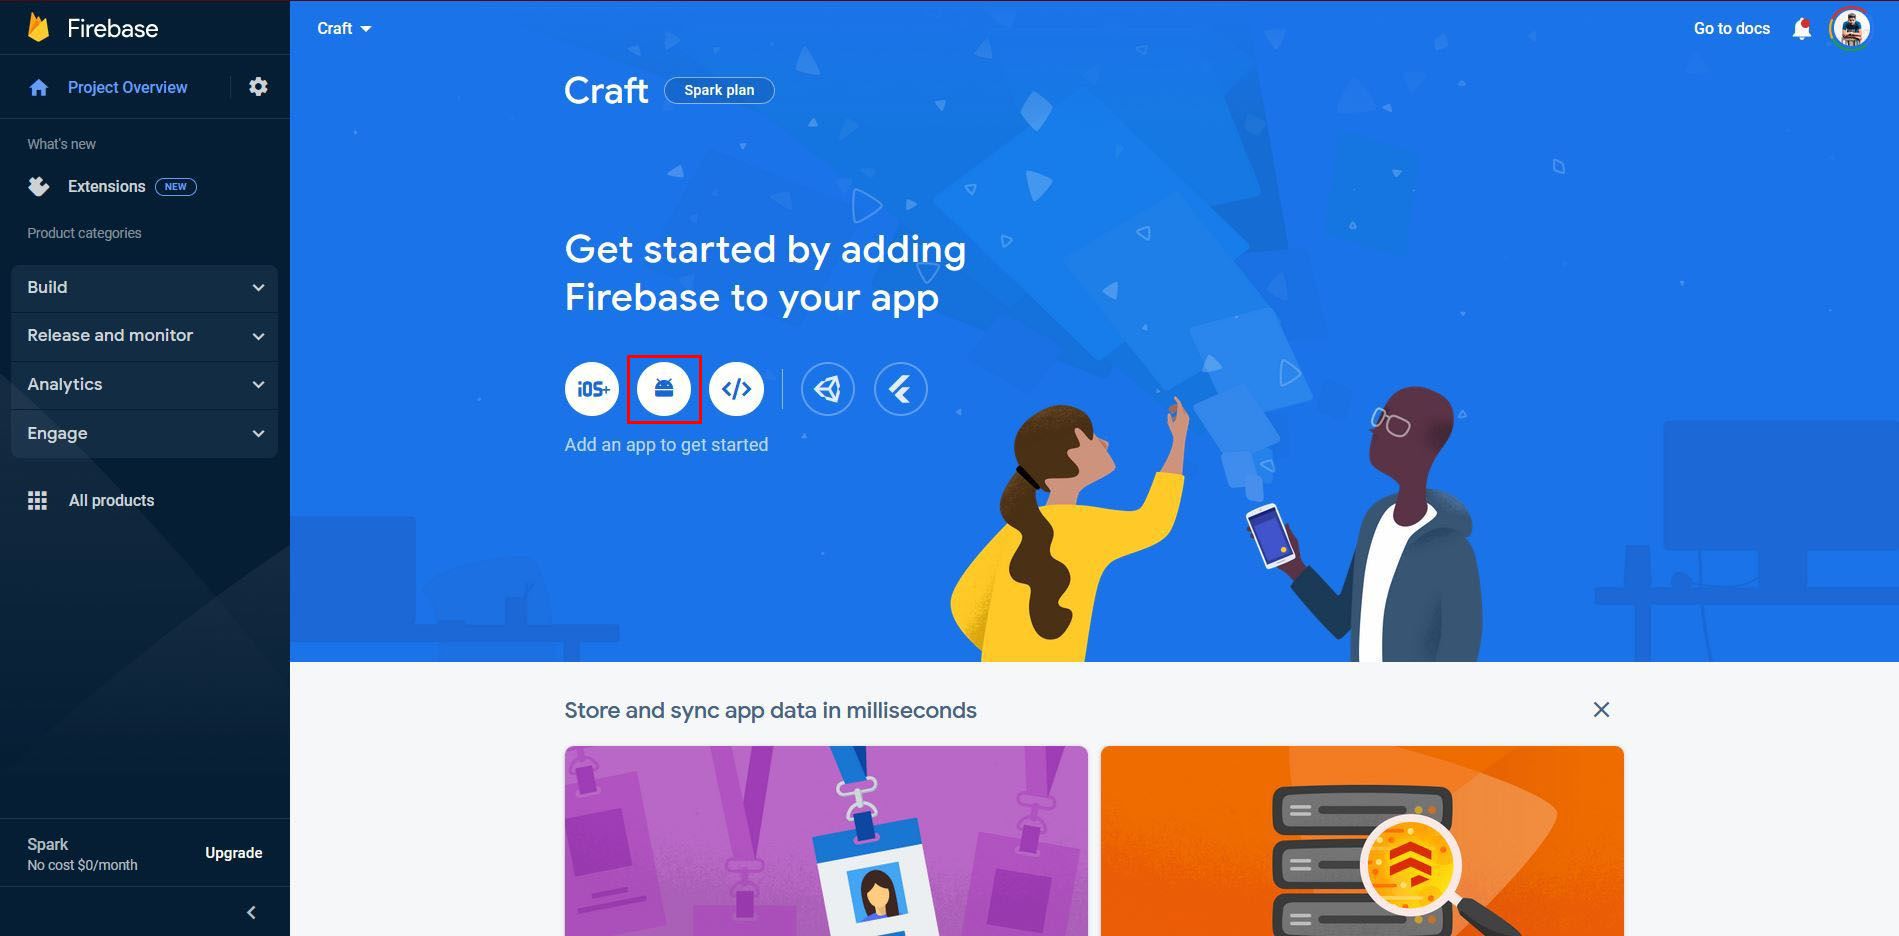
Step 5: Add Android and iOS apps to the project

Android App
To add Android support to our Flutter application, select the Android logo from the dashboard.
This brings us to the following screen
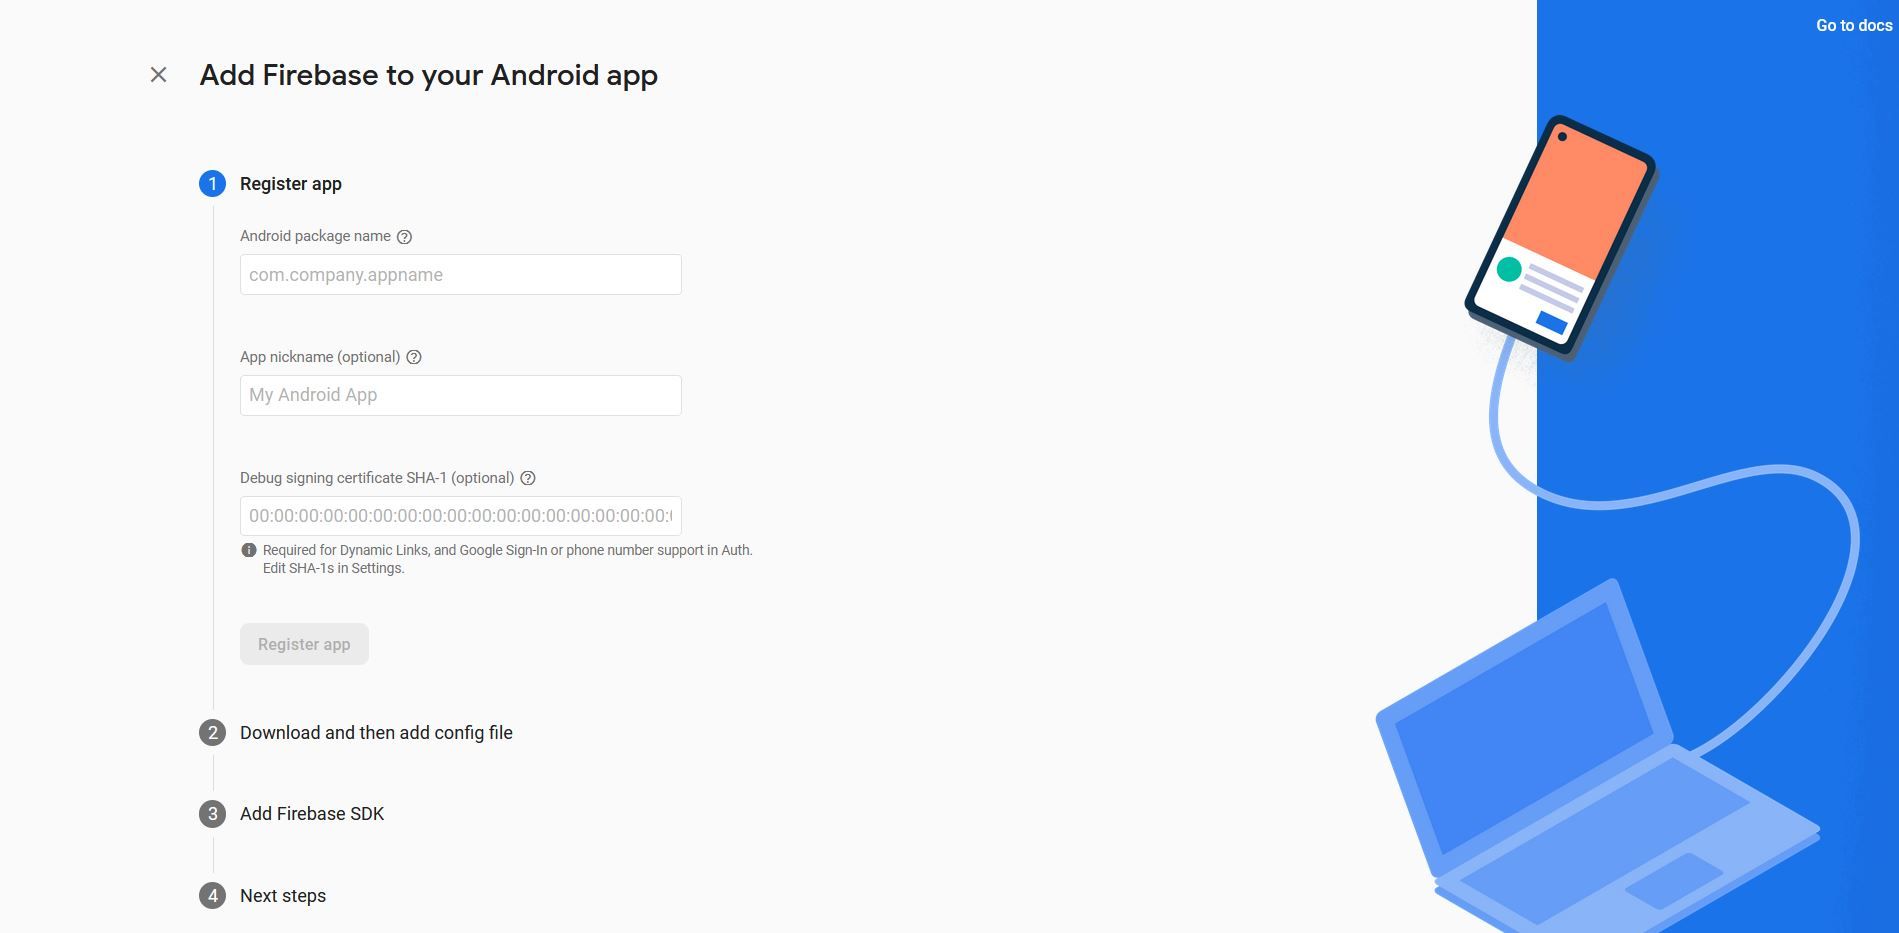
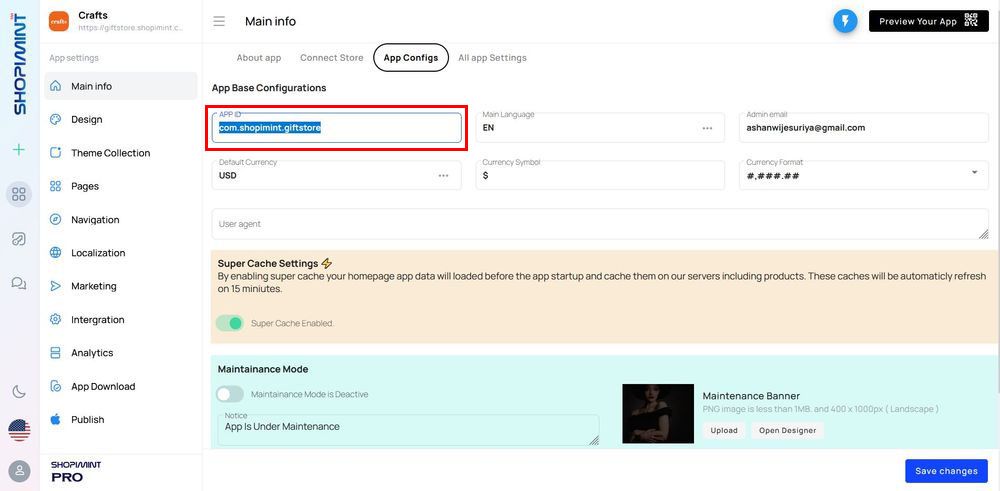
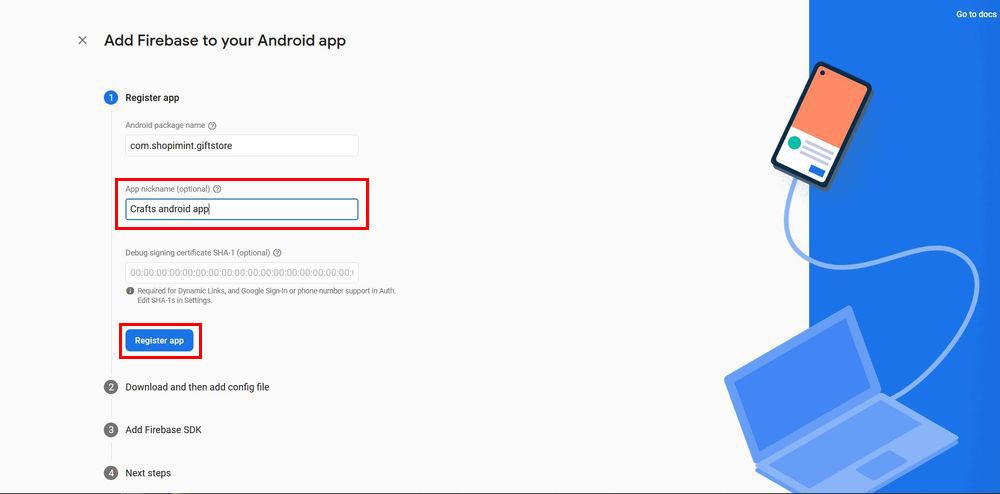
You can get the Android package name (App ID) from the Shopimint App builder.
To do that navigate,
Shopimint App builder ➝ Main Info ➝ App Configs ➝ App Id
Next, add an App nickname for the app and click the Register app button.
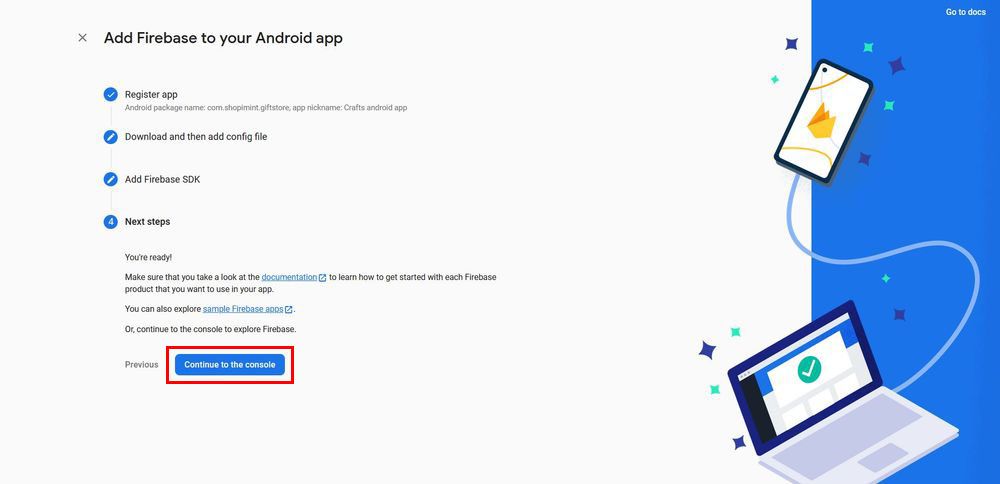
Then skip the 2nd and 3rd steps by pressing the Next button. But you need to click on Continue to the console button in the 4th step to complete the process.
iOS App
To add Firebase support for iOS, we have to follow a similar set of instructions.
Head back over to the dashboard and select Add app and then the iOS icon to be navigated to the setup process.

Once again, we’ll need to add an “iOS Bundle ID”. It is possible to use the “Android package name” for consistency:
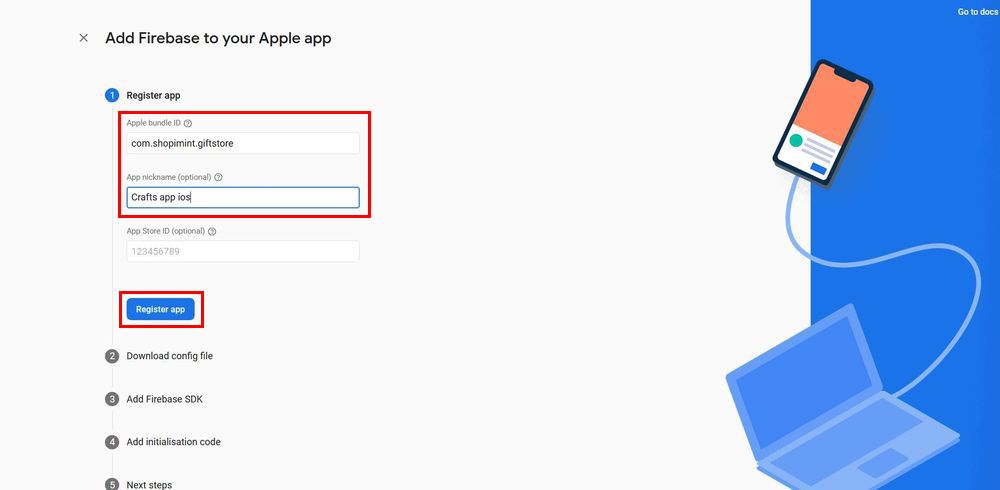
Next, add an App nickname for the app and click the Register app button.
As before skip the 2nd, 3rd and 4th steps by pressing the Next button. But you need to click on Continue to the console button in the 5th step to complete the process.
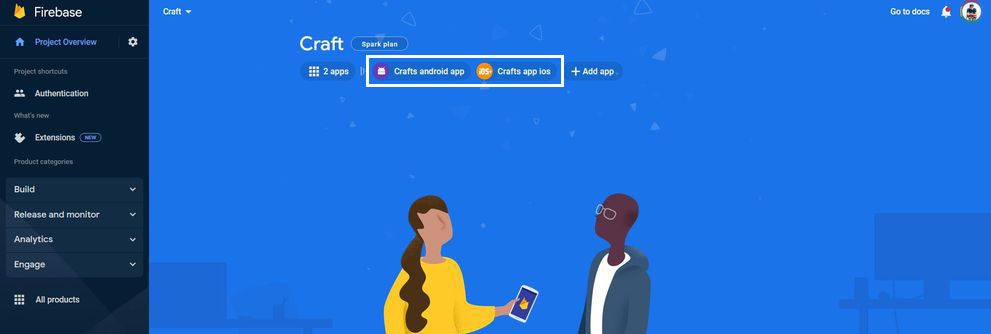
If you did all the above steps correctly, you can preview your Android and iOS app settings.
Step 6: Enable Authentication for the app
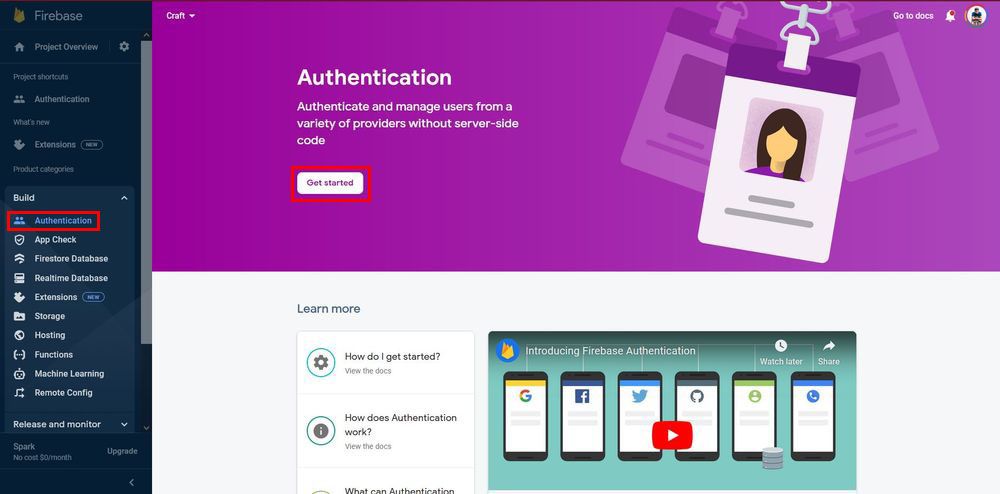
To enable social authentications for the app, please follow these steps.
To enable authentication, click the Authentication card or select "Authentication" from the left-hand navigation, then click the Get Started button once the page loads. This is where you can configure providers you would like users to be able to sign in with.
Then it will bring us to the following screen.
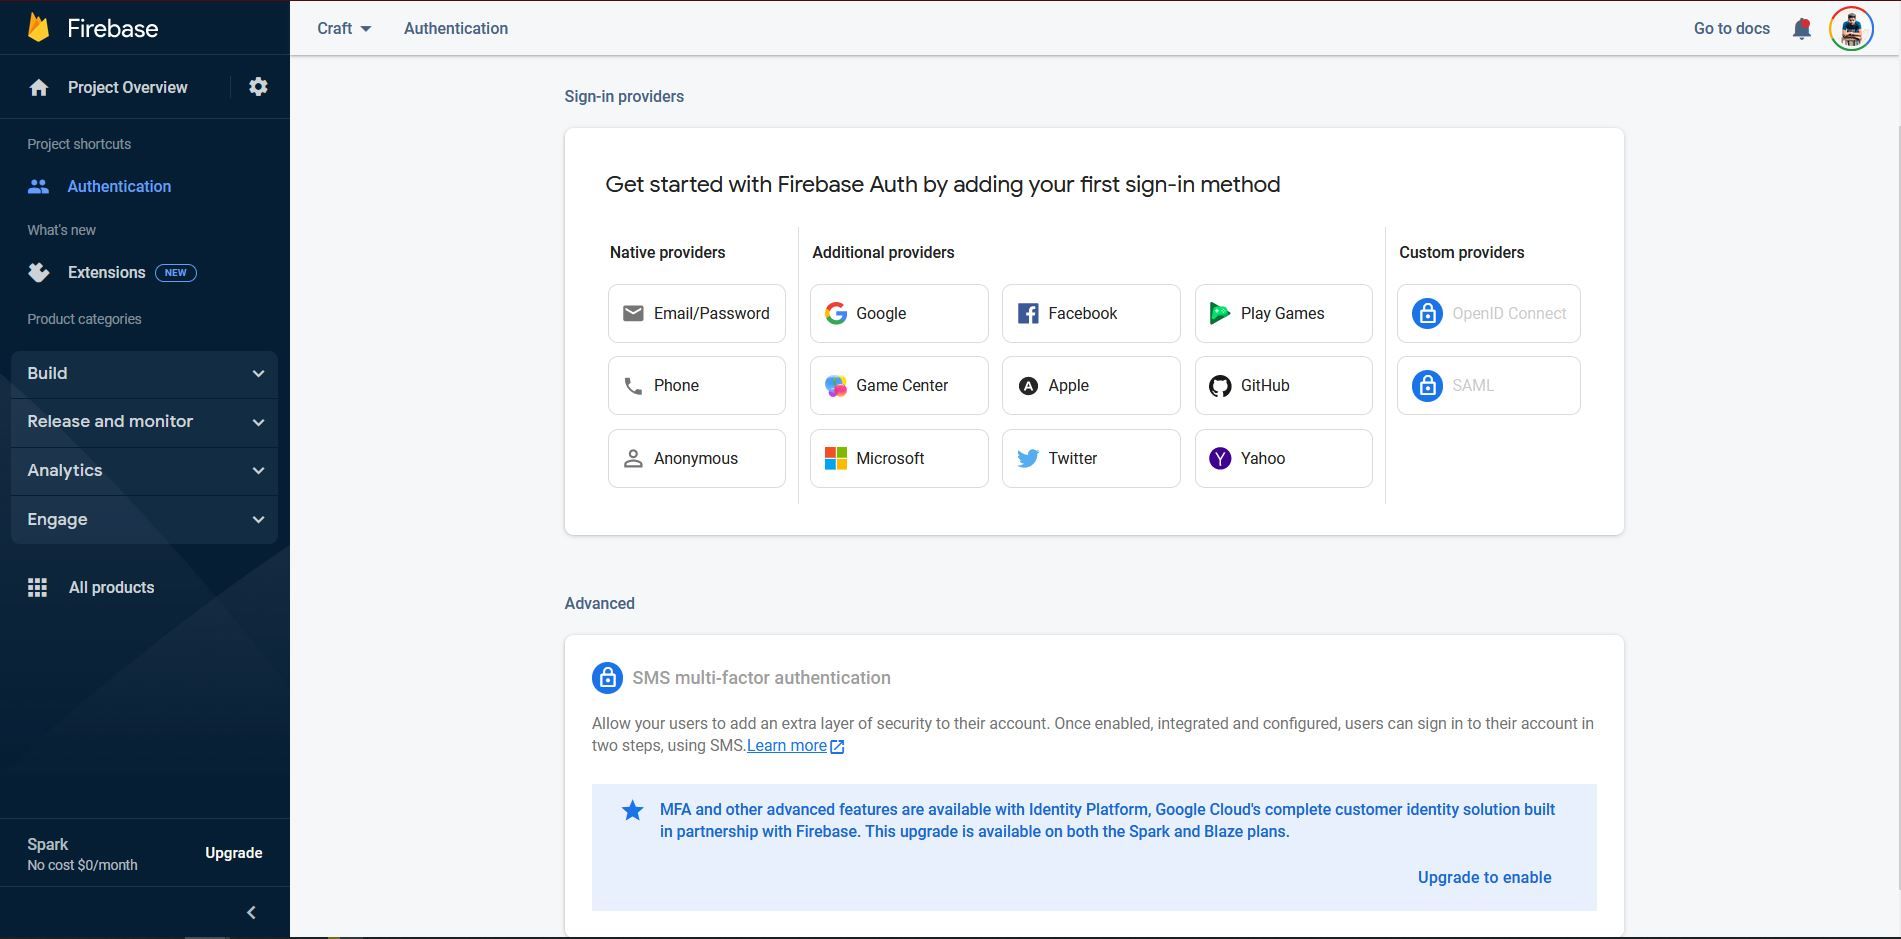
Google Account Sign-In
In the sign-in methods list, you can see a button named Google with a Google icon. Click on it to configure the Google Sign-in option.
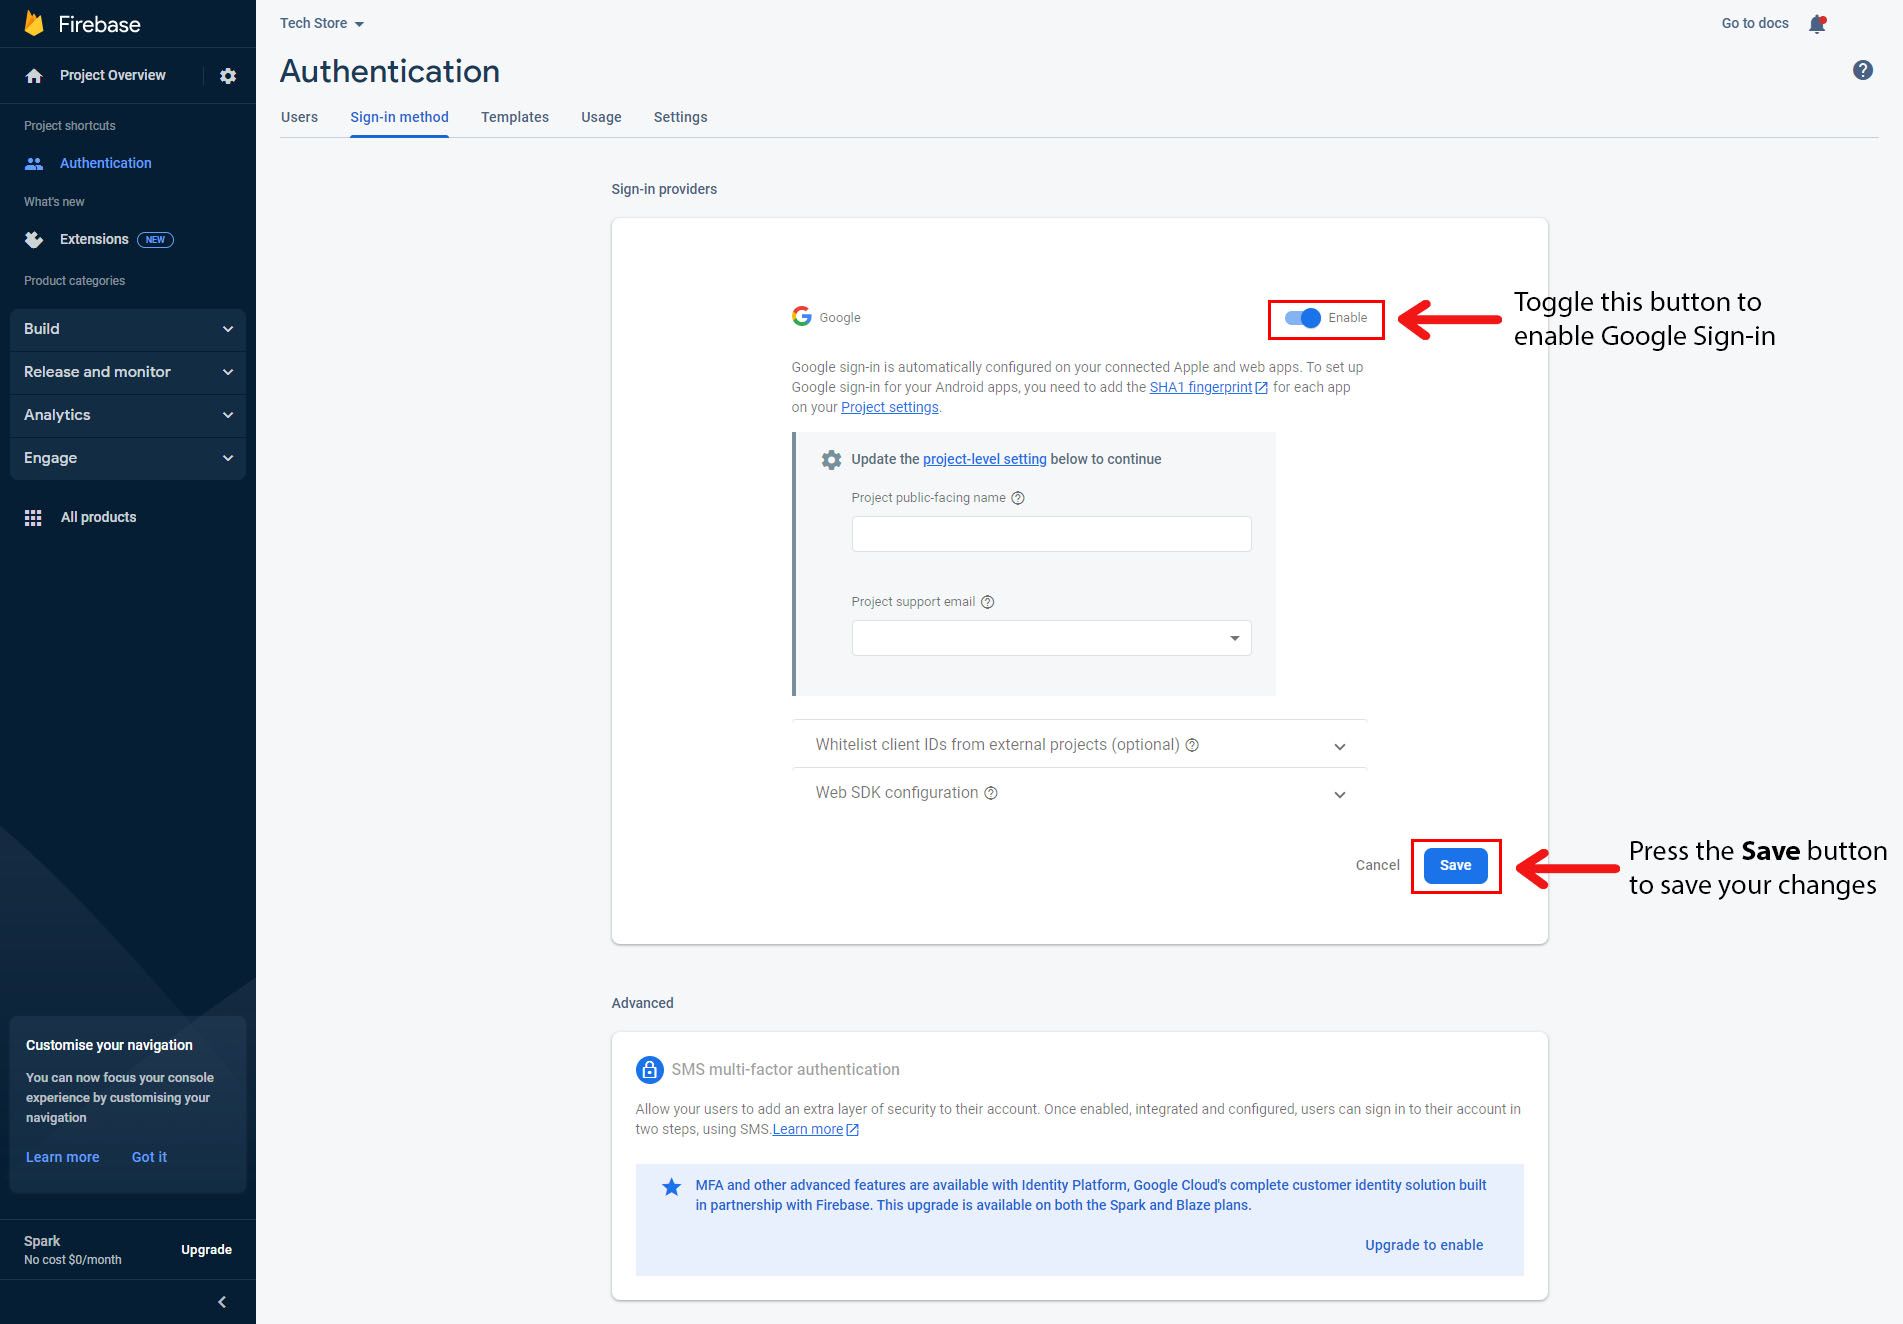
Toggle the Enable switch to enable Google Sign-in for your project, select an email account for Project support e-mail and press the Save button. (If there are any popup dialog press the Done button on it)
Apple Sign In
Again click on Add new provider and click the button named Apple to enable Apple Sign-in in your app.
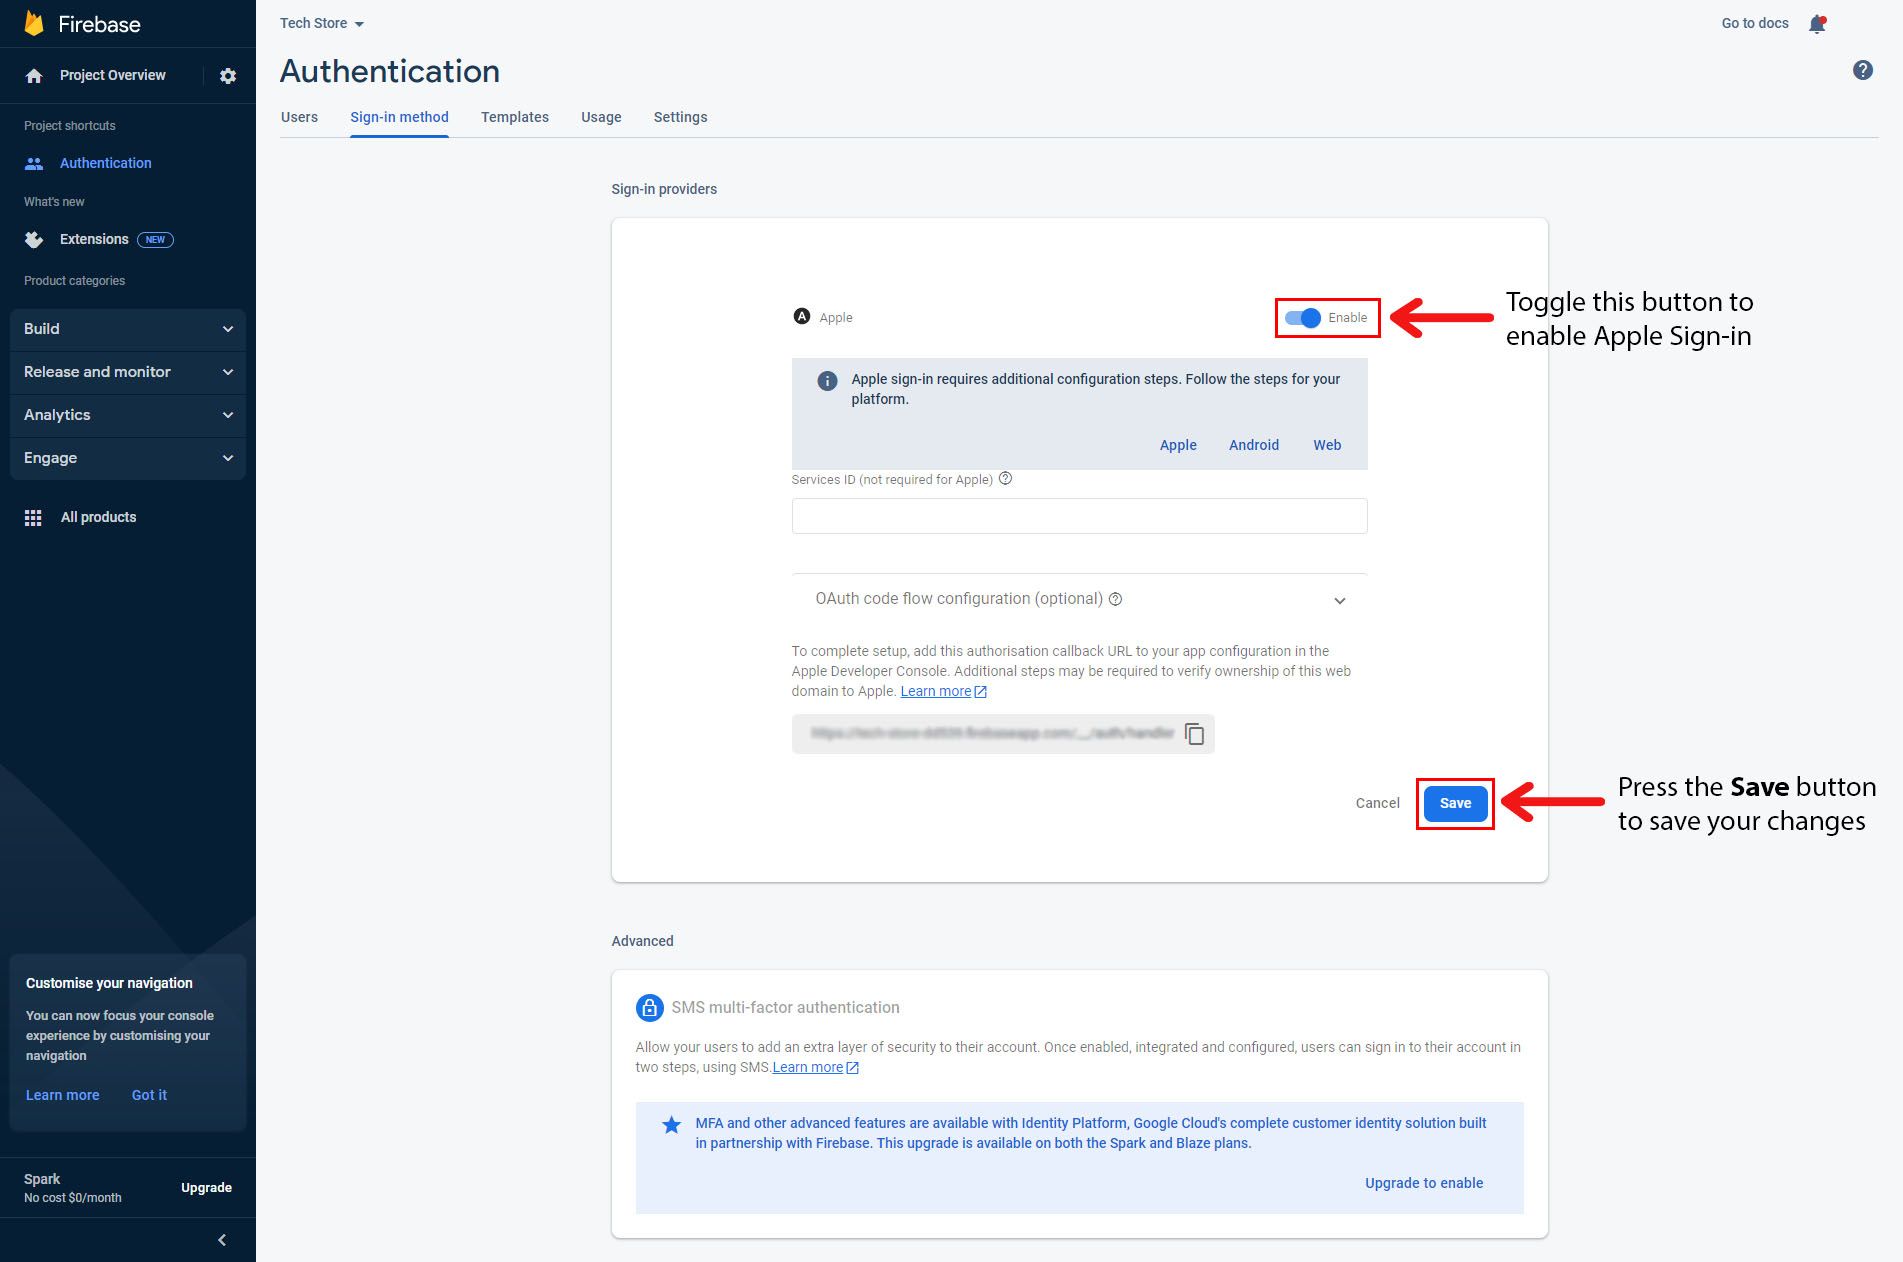
Once again toggle the Enable button to enable Apple Sign-in and press the Save button.
Step 7: Add Firebase Configurations to Shopimint App Builder
For adding Firebase Configurations to the Shopimint App builder, you have to navigate,
Shopimint App builder ➝ Integration ➝ Firebase Integrations
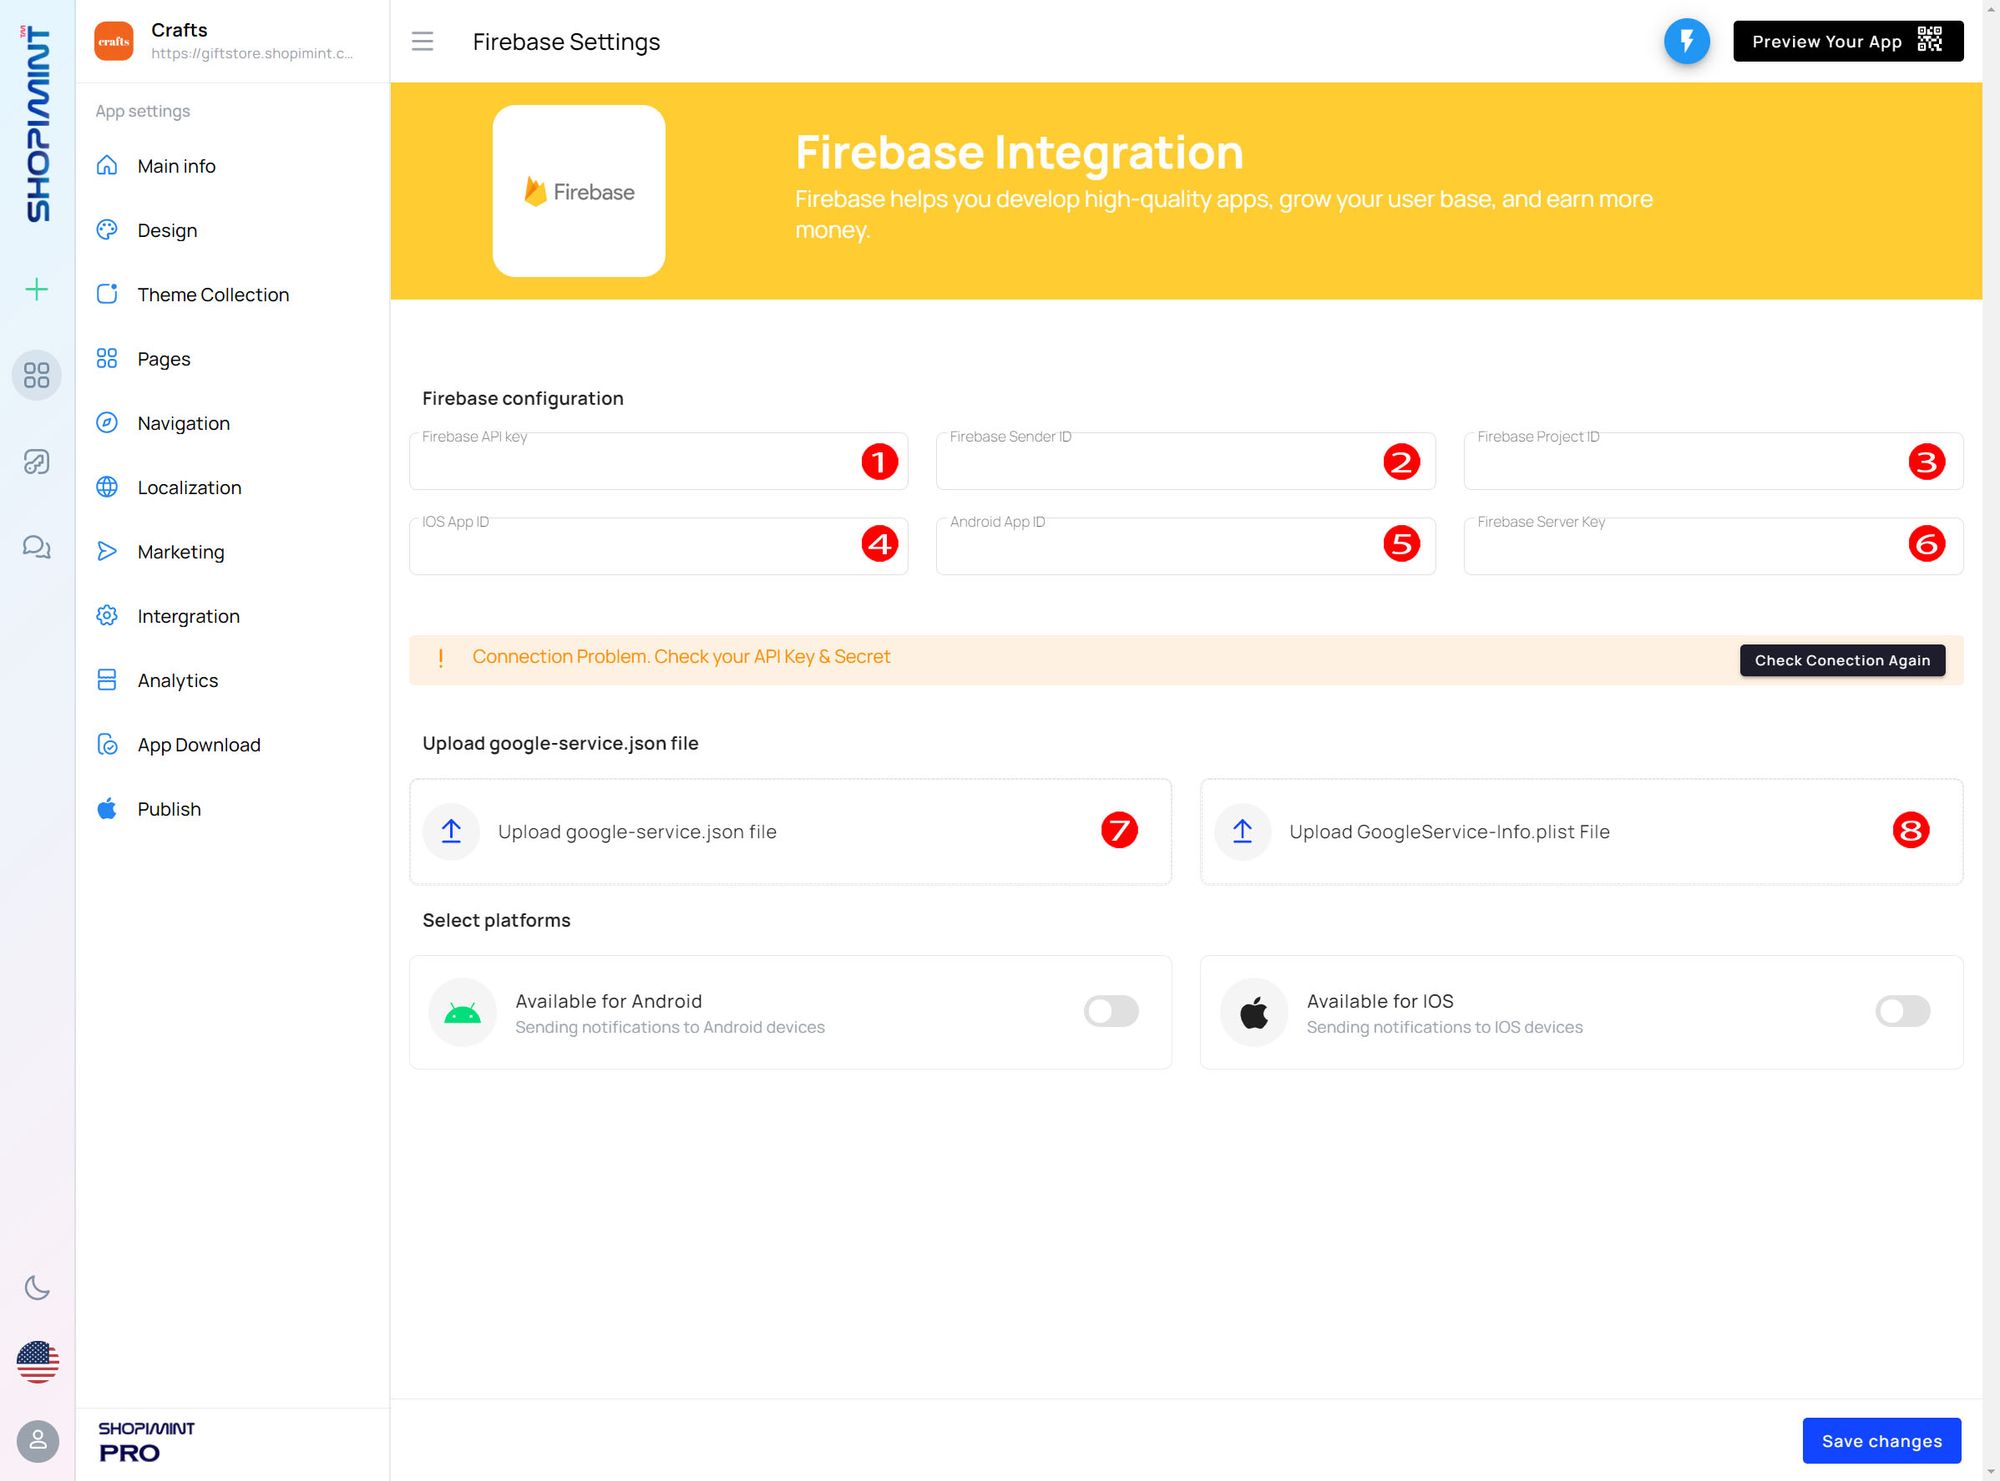
Now let's see how to do all those things one by one.
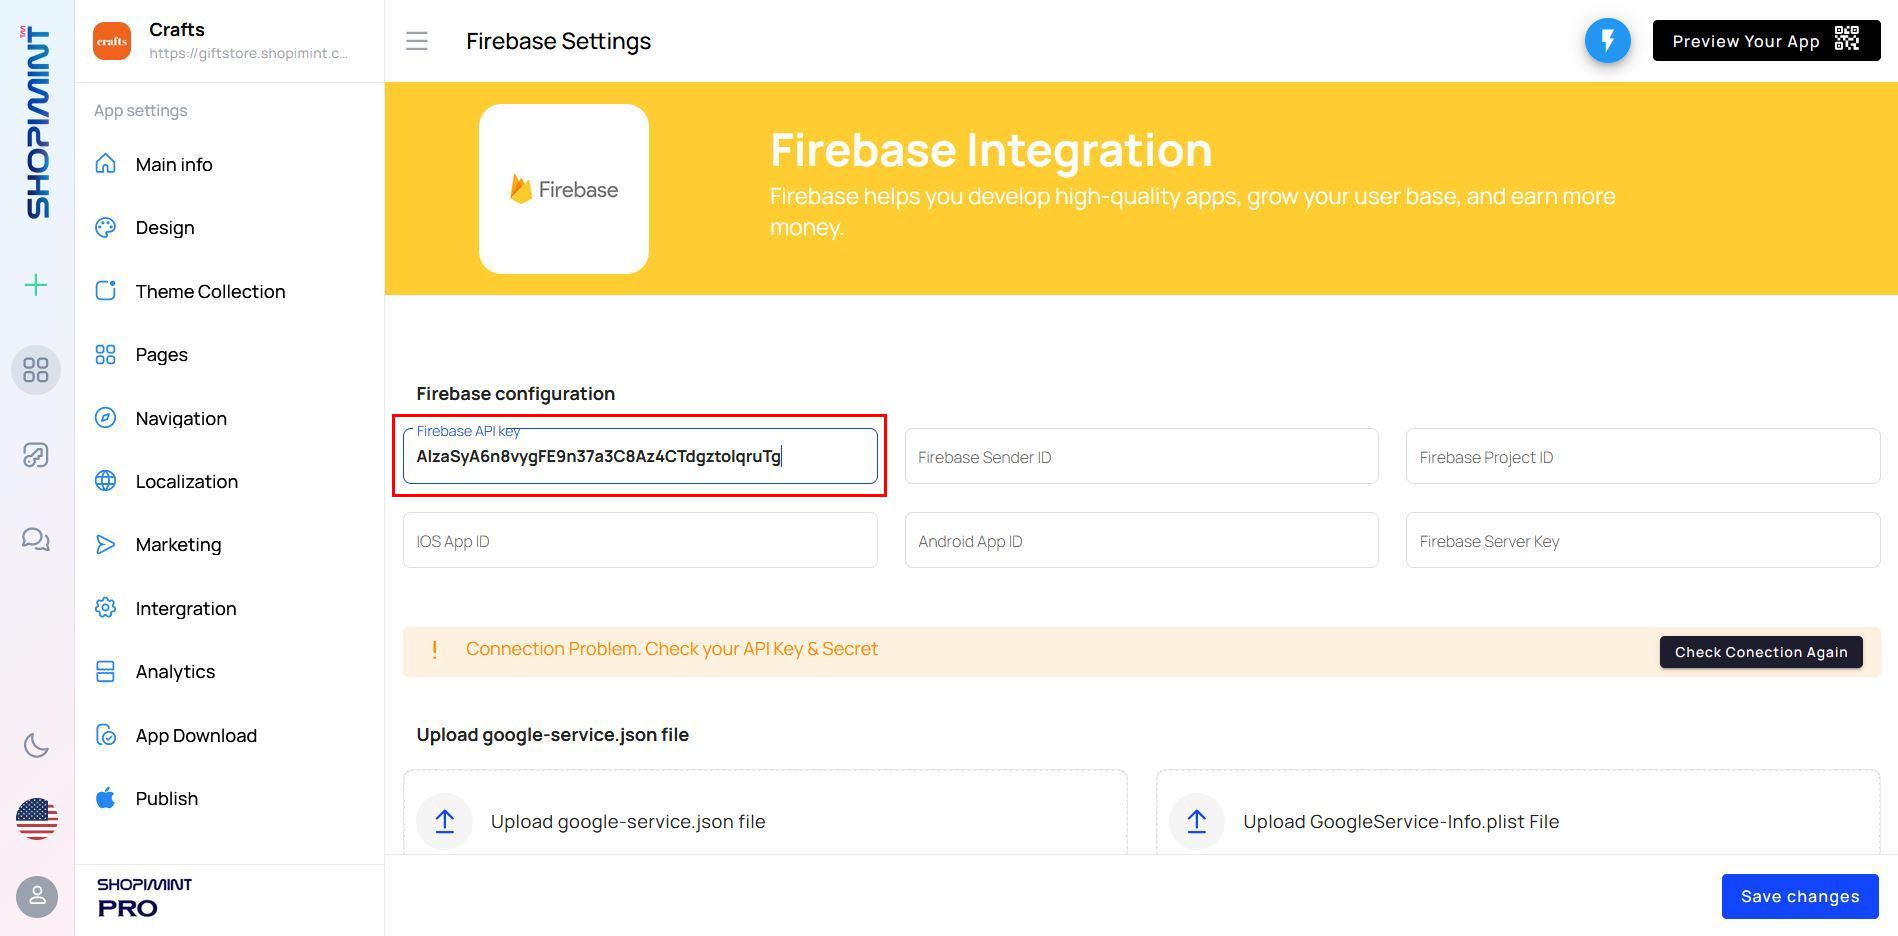
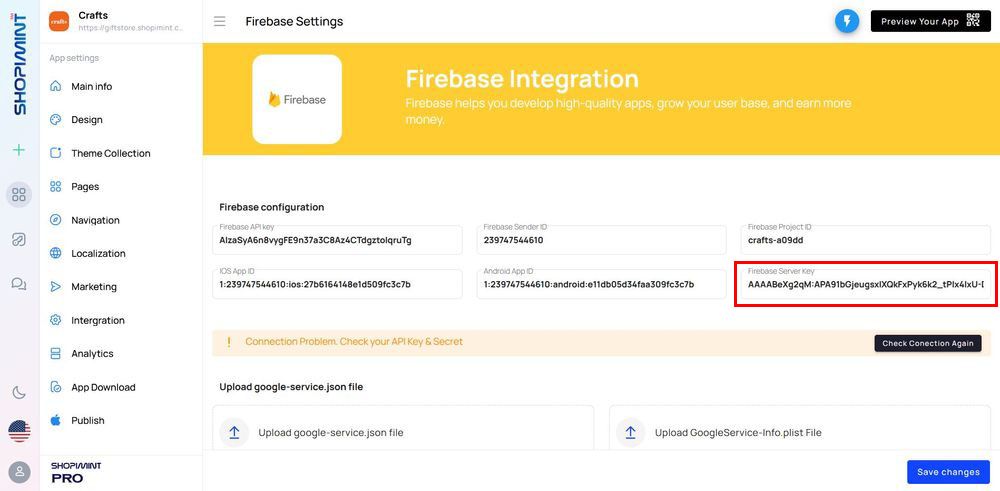
01. Add Firebase API Key
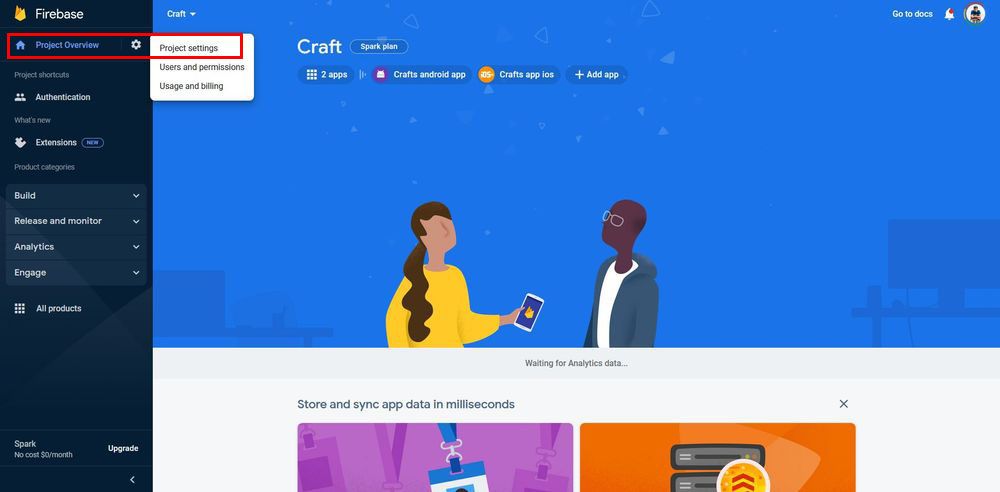
First, you need to find your Firebase API key and add it to Shopimint App Builder. To get that move again to your Firebase console Dashboard, click on the Settings icon ( ⚙ ) top left in your Firebase Dashboard and select Project Settings.
Now you are in the Project Settings screen, In the General tab, you can see the Web API Key of your Firebase Project.
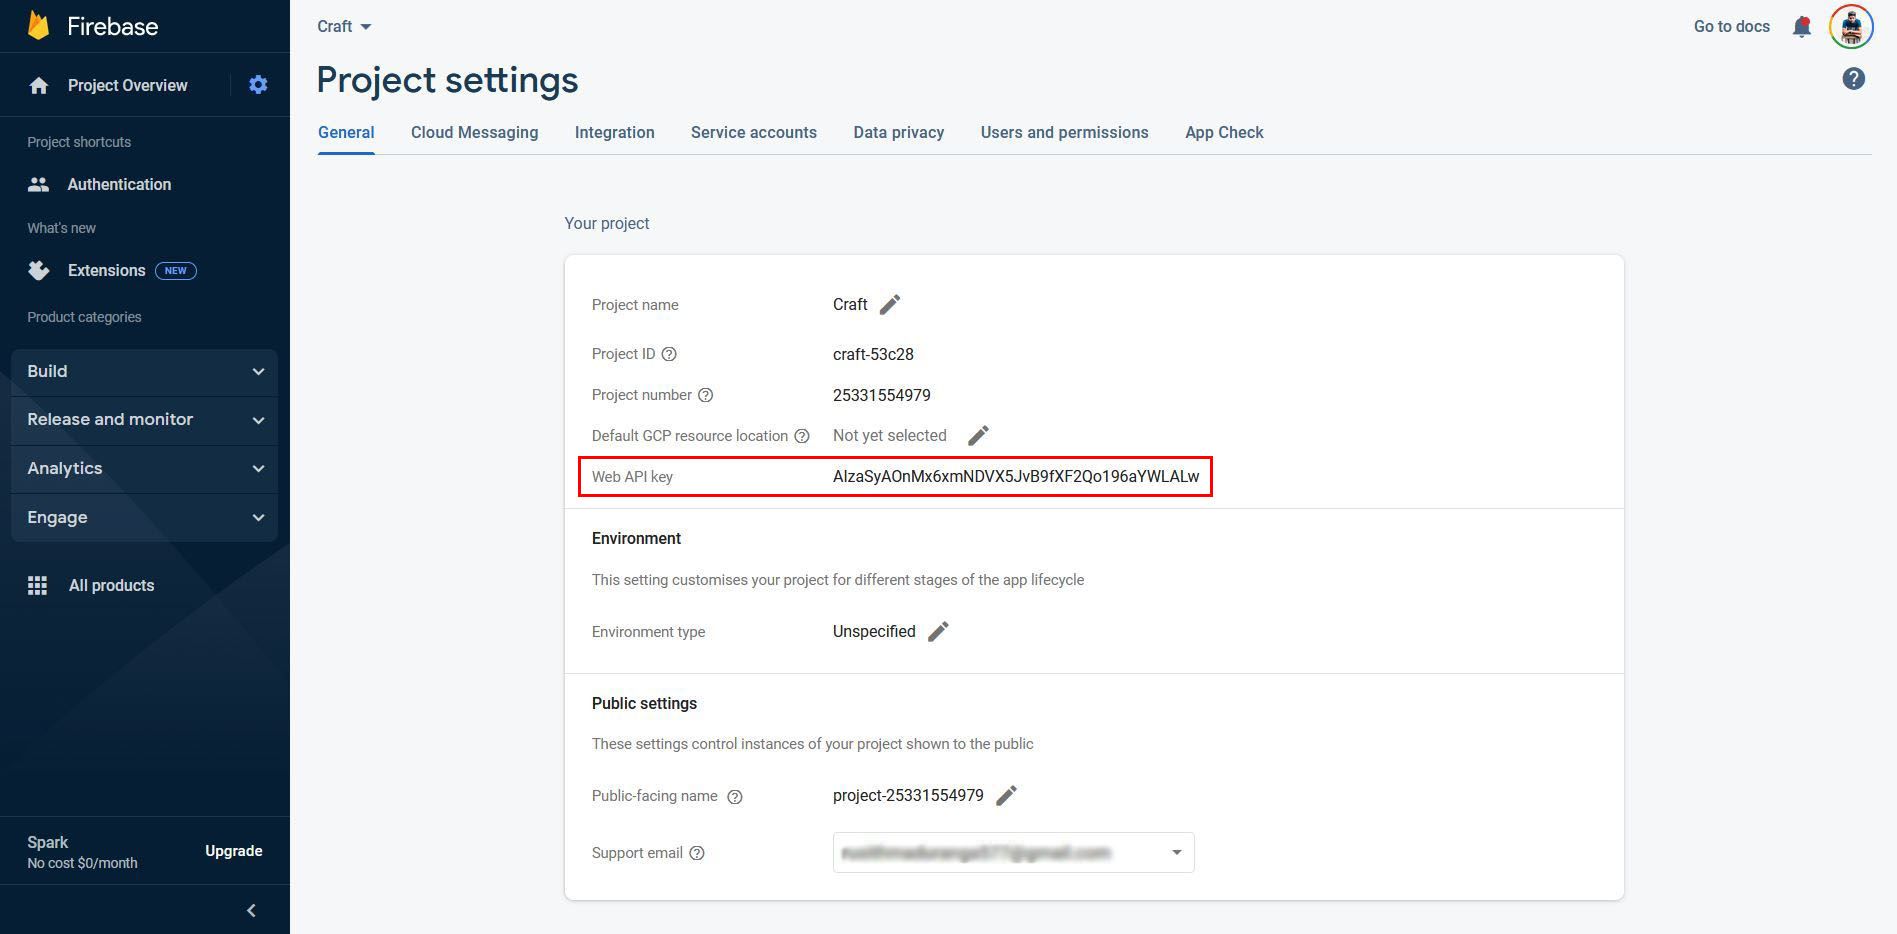
Copy it and paste it on the Firebase API key text field on Shopimint App Builder.
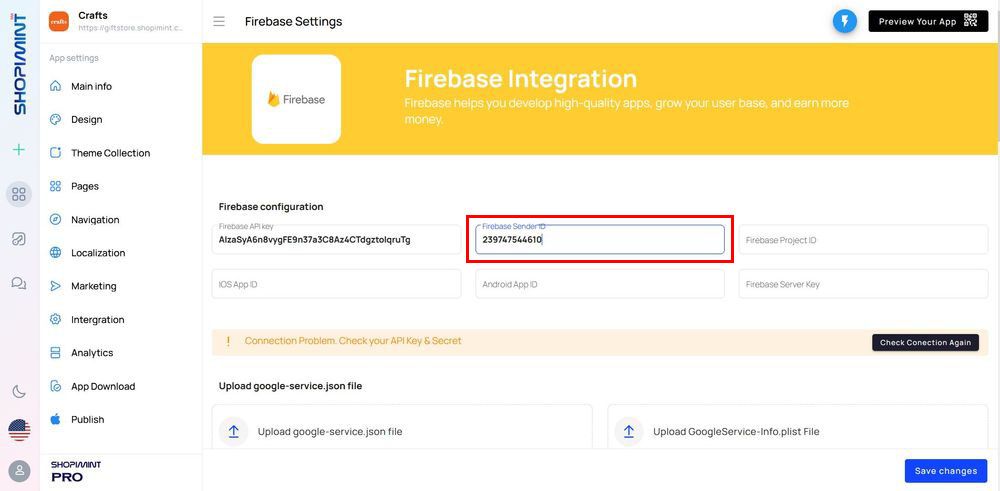
02. Add Firebase Sender ID
Again move to Firebase Console, Select the Cloud Messaging tab, and Copy that value under the Sender ID.
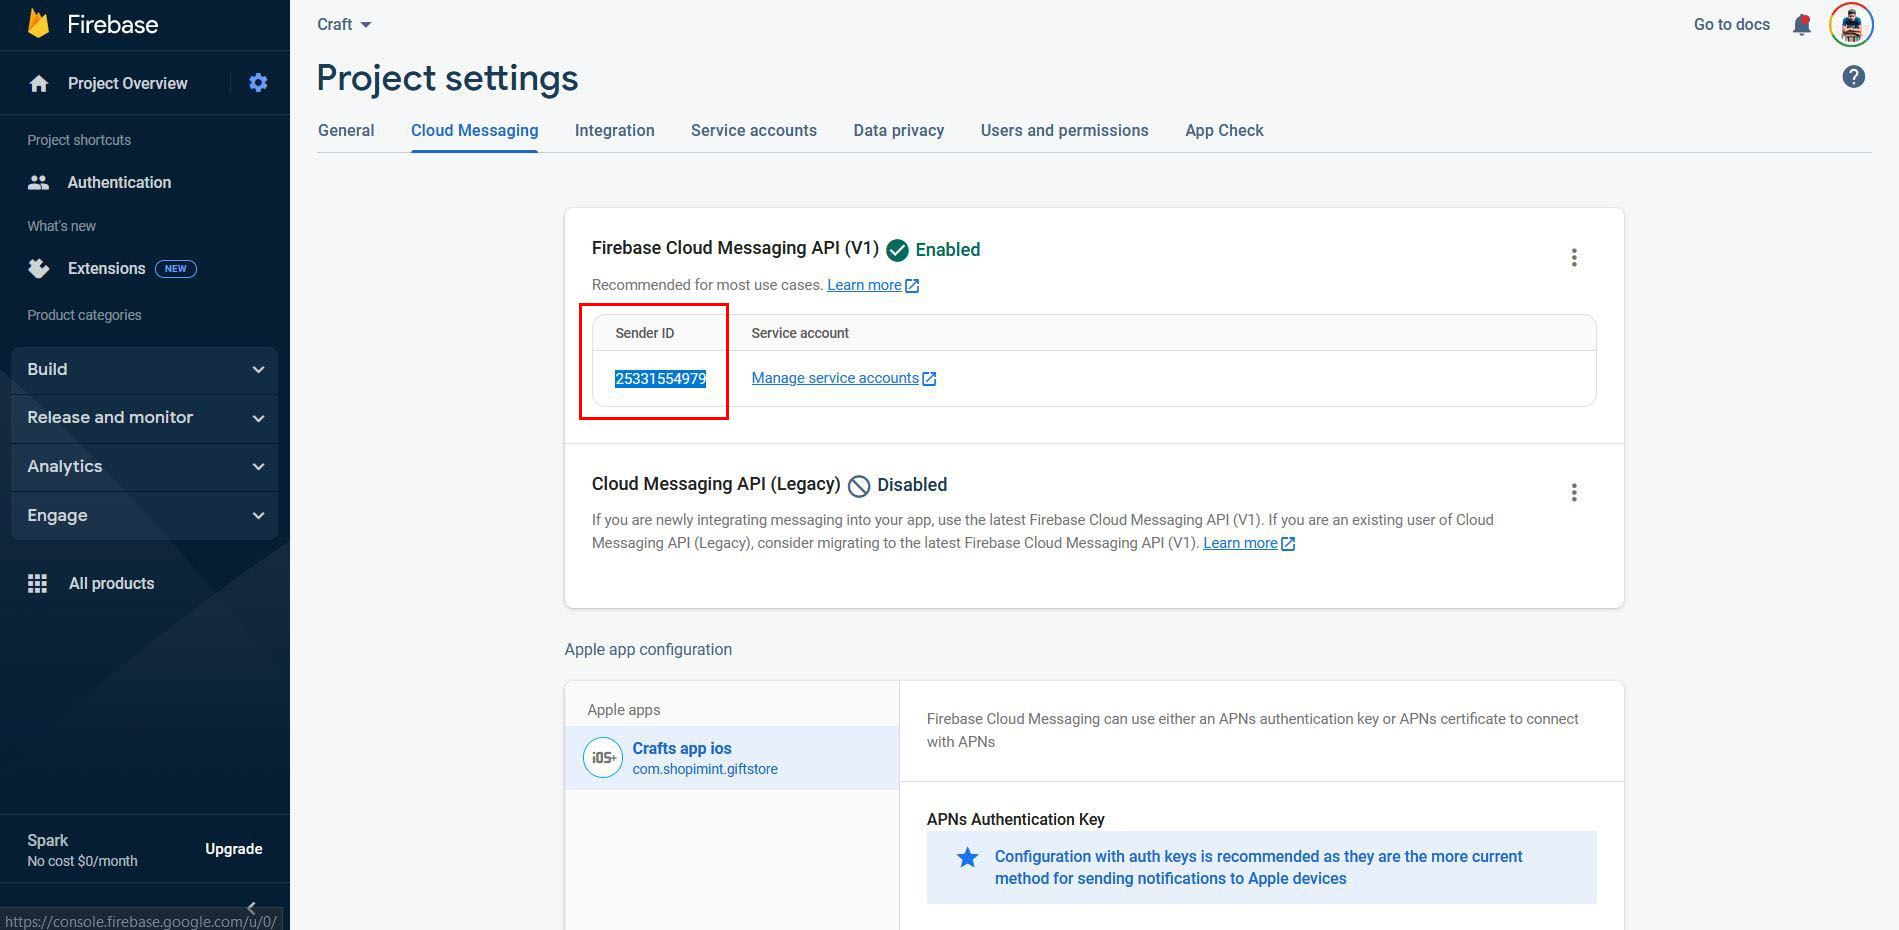
Paste that value into the Firebase Sender ID text field in the Shopimint App Builder Firebase settings page.
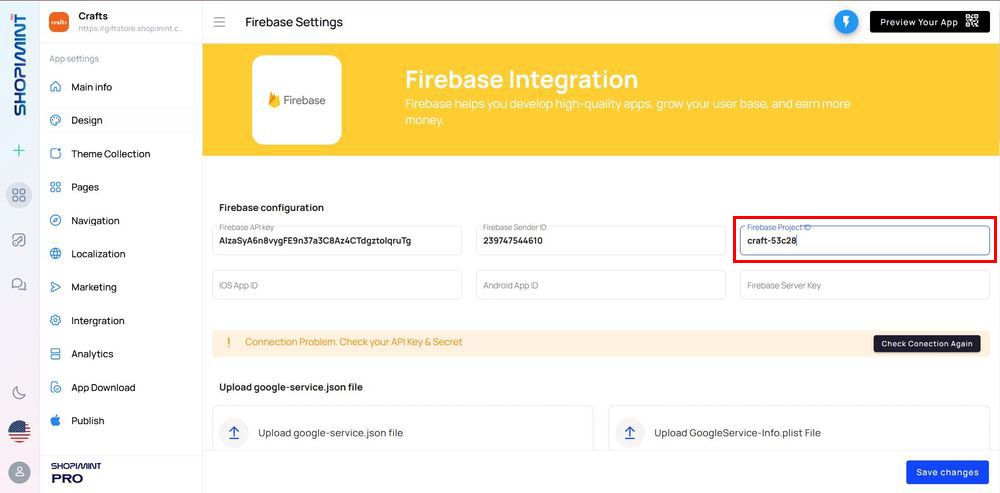
03. Add Firebase Project ID
To add Firebase Project ID, move to the Firebase Console Project Settings page and copy the value next to Project ID.
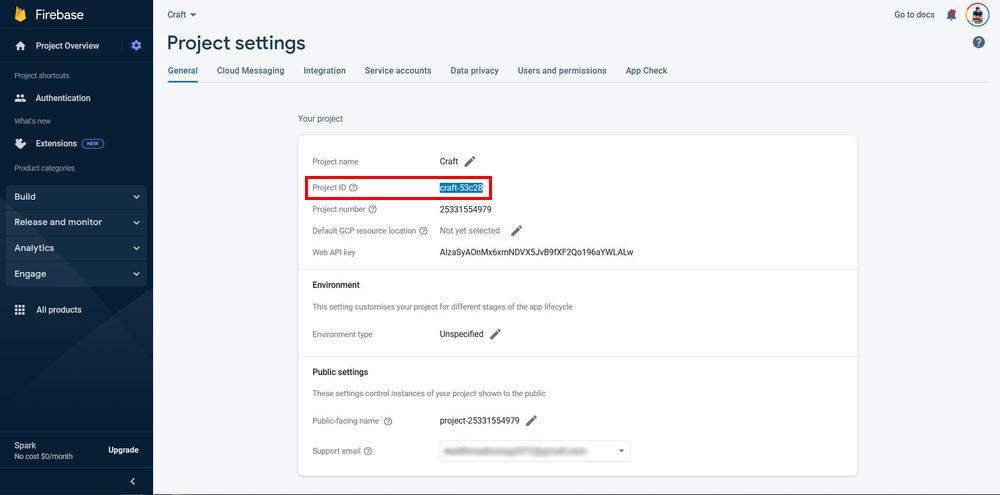
Then paste it into the Firebase Project ID field in Shopimint App Builder.
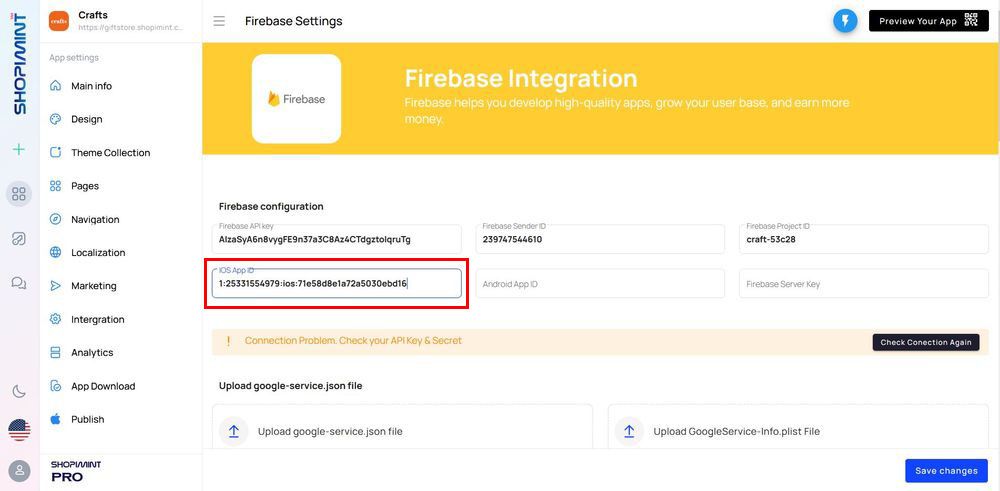
04. Add iOS App ID
The next step is adding the iOS App ID you have already created, to Shopimint App Builder. To do that you need to move again to Firebase console -> Project Settings and scroll down in the General section. When you scroll you can see a new list named Your Apps. First, click on your iOS app in your apps list and copy the value under the App ID.
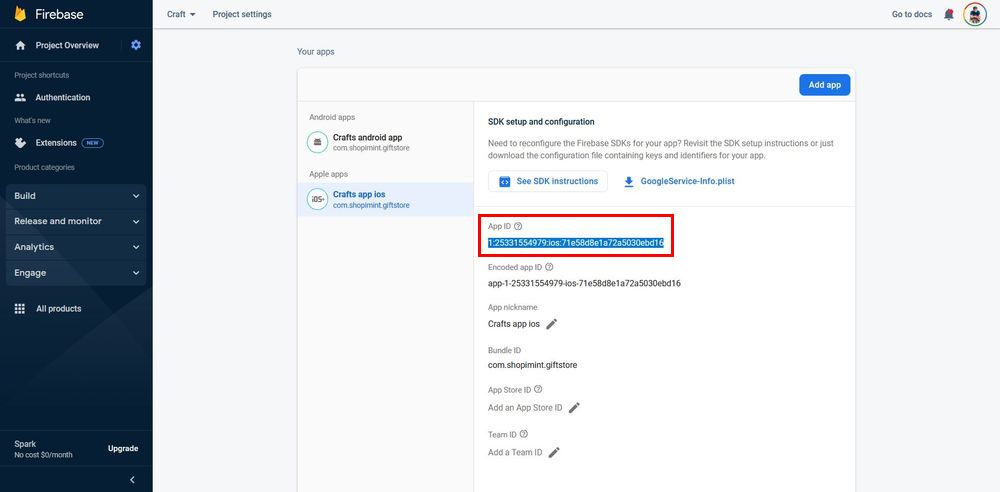
After you copy, paste it on the iOS App ID text field in Shopimint App Builder.
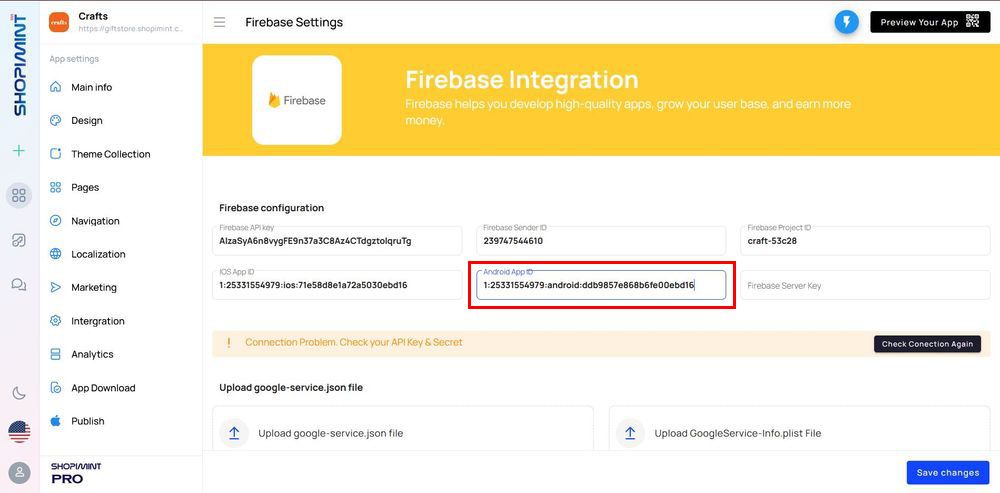
05. Add Android App ID
The next step is Adding an Android App ID to Firebase Settings in Shopimint App Builder to do that, move back to Firebase Console and click on the Android app you have already created. Now repeat the steps mentioned earlier in adding an iOS app ID to your Shopimint App Builder.
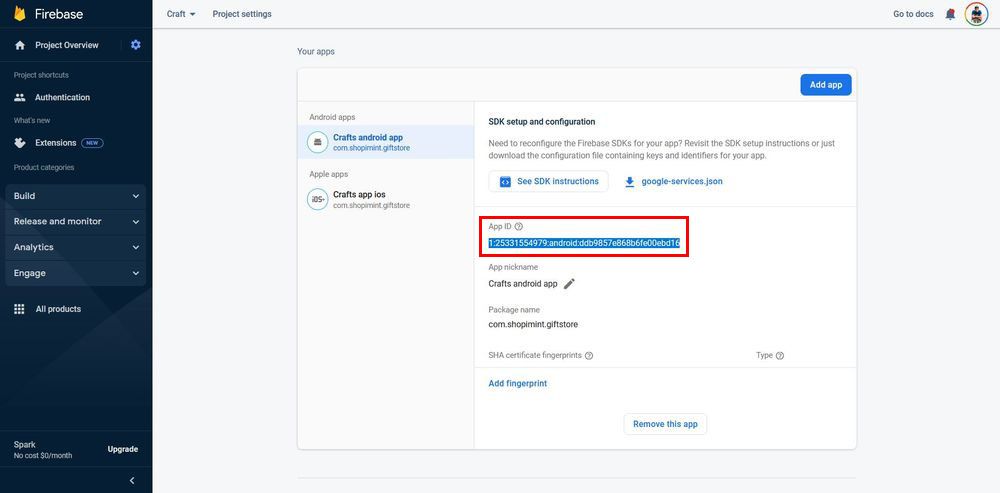
Finally, paste that copied Android app ID to the Android App ID in Firebase Settings.
06. Add Firebase Server Key
Next, you have to add the Firebase Server Key to Shopimint App Builder. To get the Server Key, you need to move again into your Firebase Console Project Settings and click Cloud Messaging on top. Next, click the three-dot icon mentioned in this screenshot.
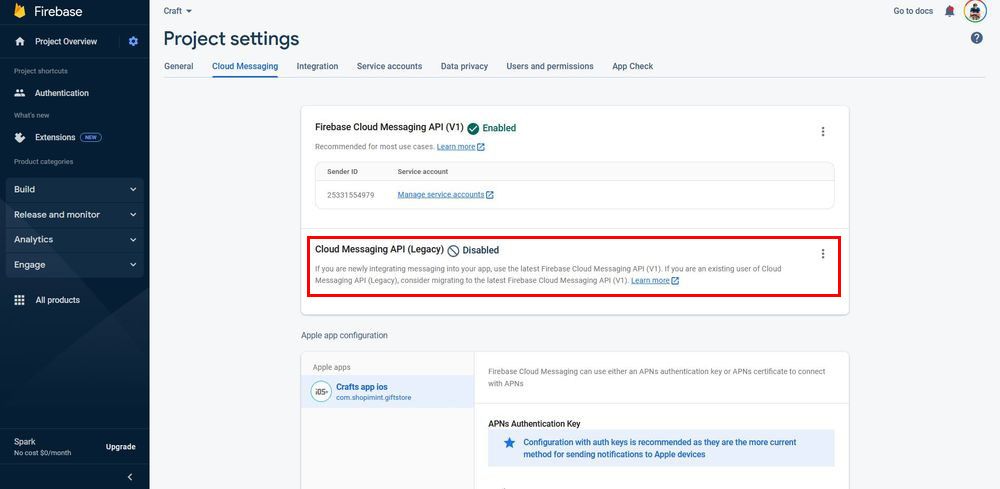
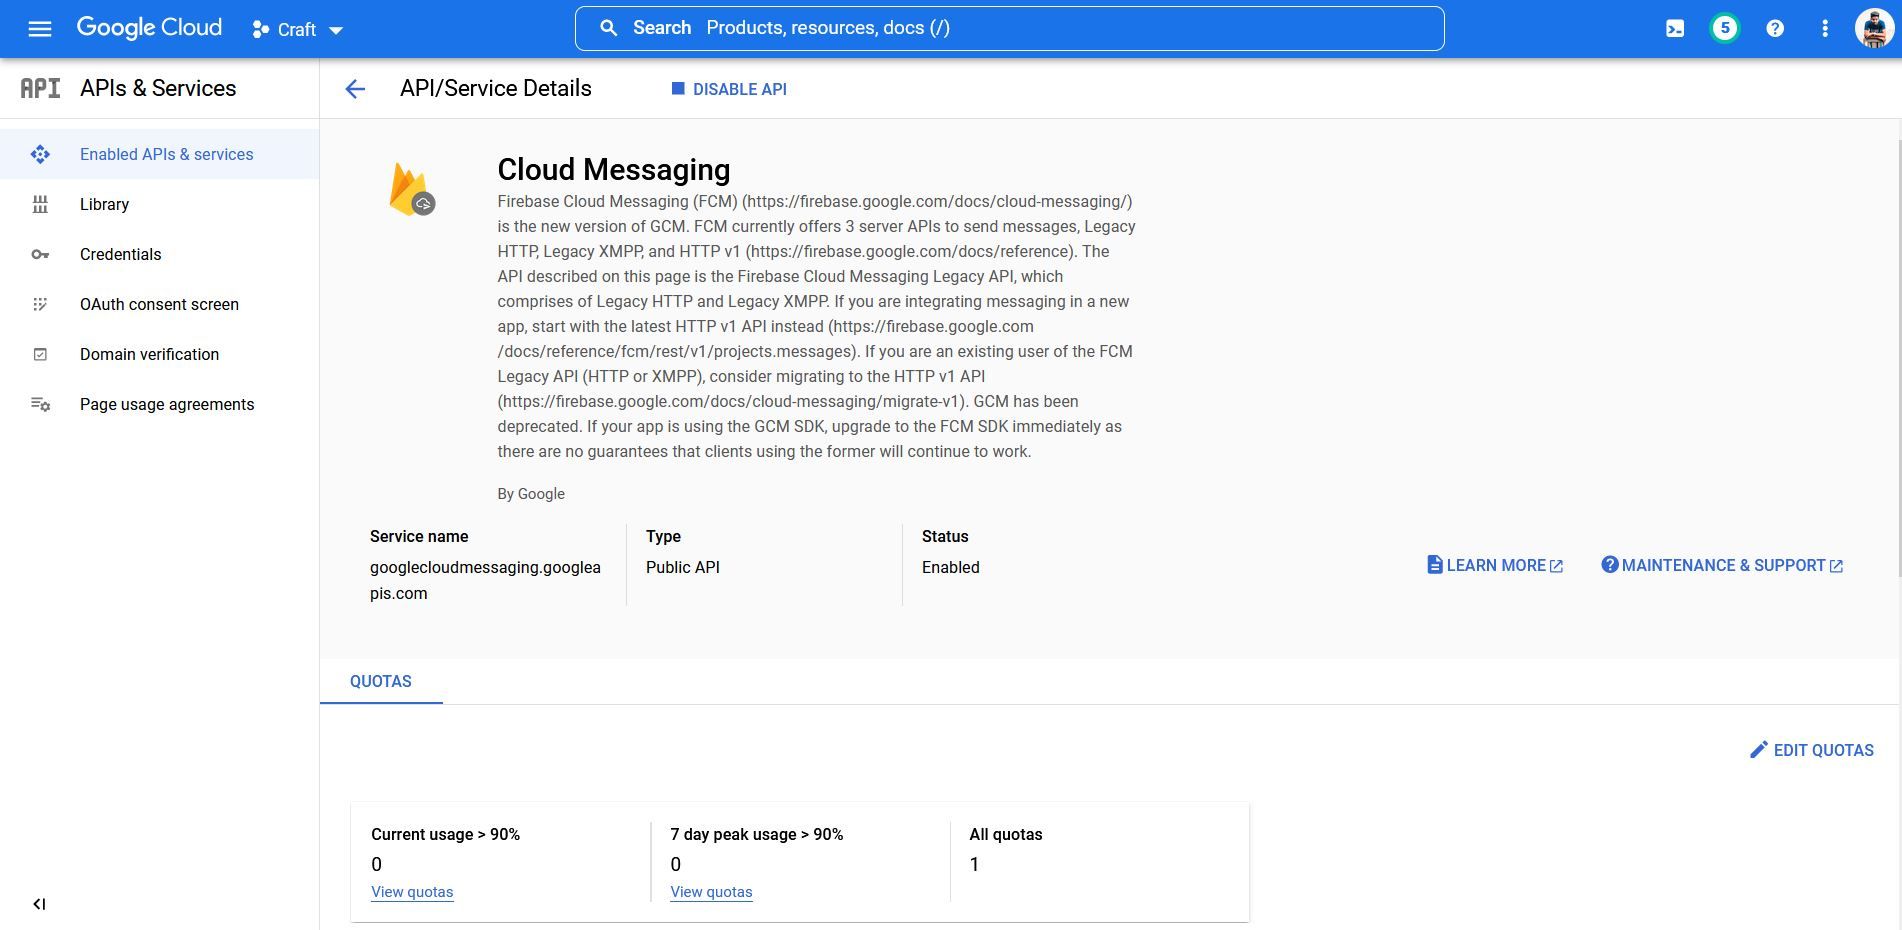
Next, click the Manage API in the Google Cloud Console button. It will bring you again into the Google Cloud Console following screen. Click the Enable button to continue.
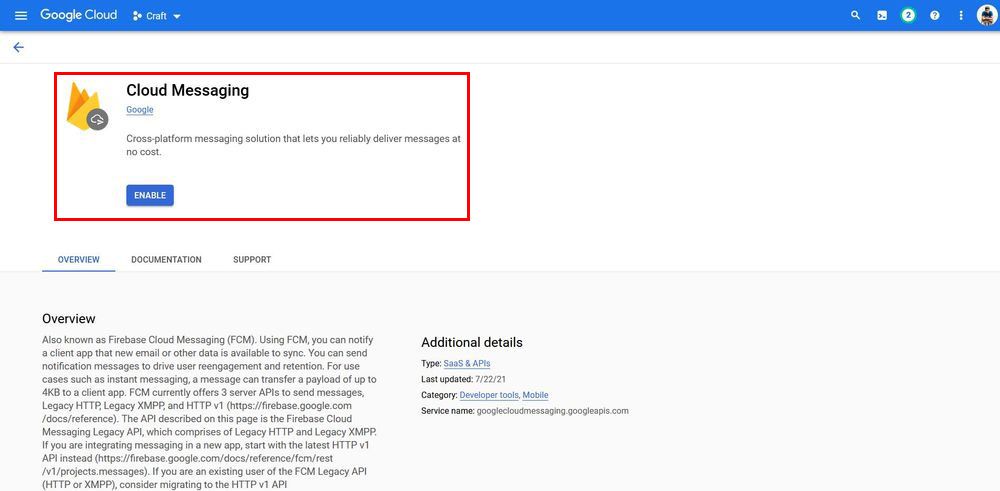
In a few seconds, you will be redirected to the API/Service Details page. It means Cloud Messaging API has been successfully enabled.
Now go back to Firebase Console Project Settings and reload the page. After reloading, you can see the Server key value is showing under the Token in the following screenshot. Copy it.
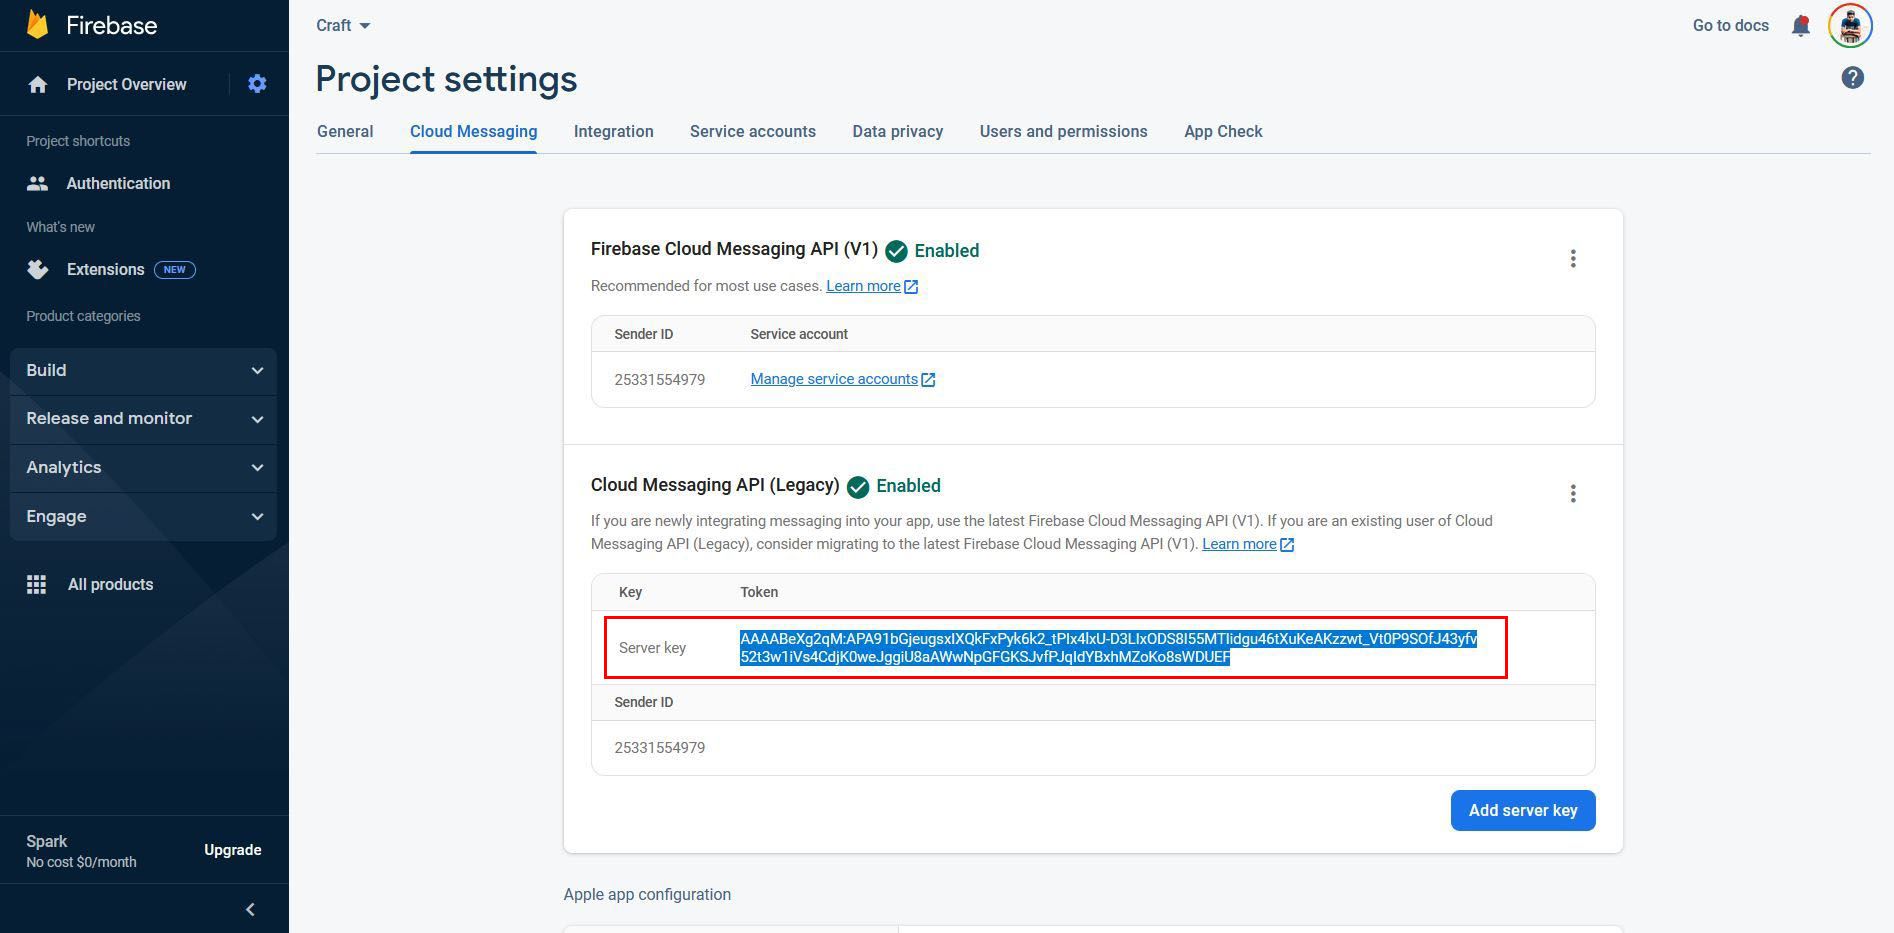
Now go back again to the Shopimint App Builder - Firebase Settings page and paste the copied Server key into the Firebase Server Key text field.
07. Download google-service.json file & GoogleService-info.plist file
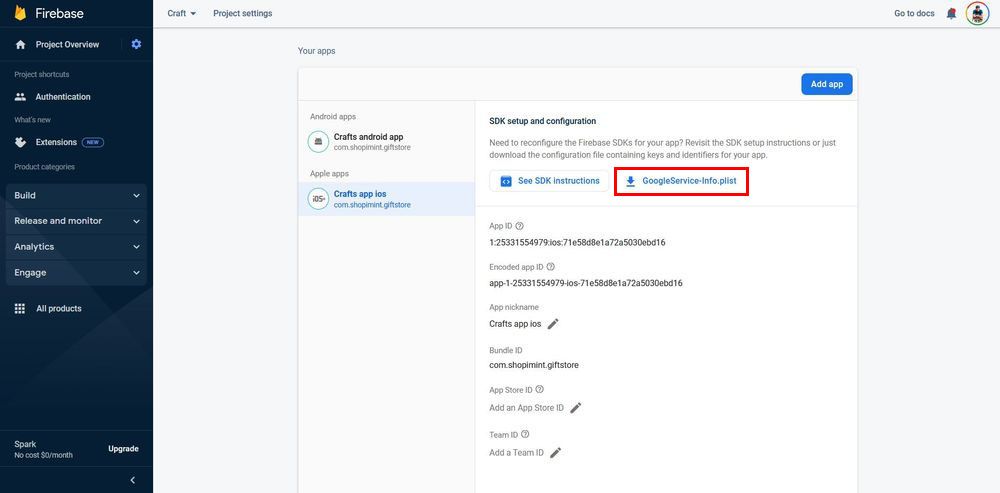
Now you have to upload the Google Services.json file and GoogleService-info.plist file into the Shopimint App Builder. Before uploading those files you need to download them. To download them move again into Firebase Console ➝ Project settings ➝ General and scroll down to your app list.
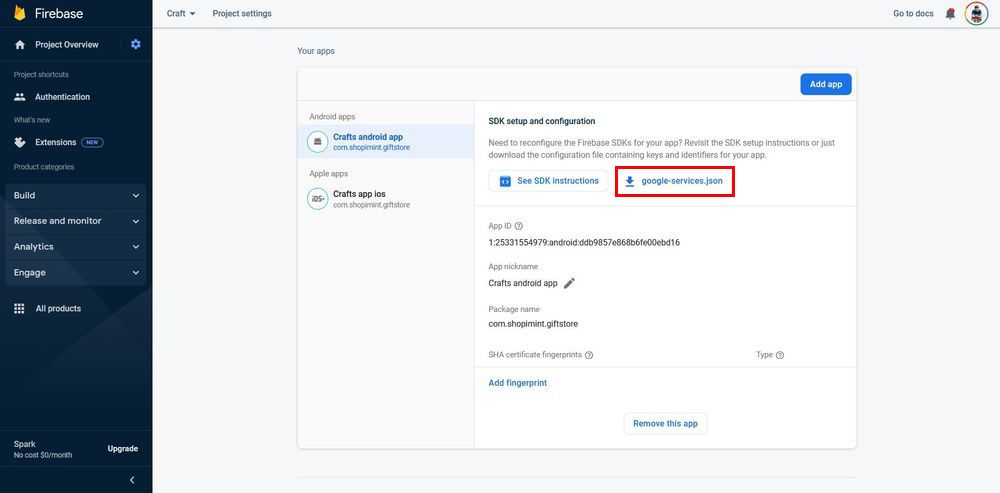
First, click on your Android app. Then you can see a button, named google-services.json with a download icon. Click on it to start downloading. After downloading completed click on your iOS app.
As mentioned above you can see a new button, named GoogleService-info.plist with a download icon and download it too.
08. Upload downloaded files
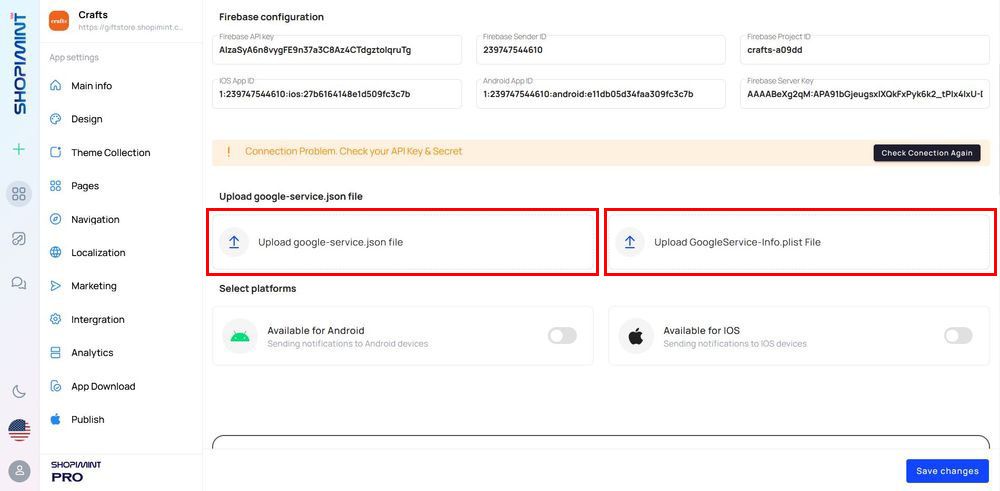
Now you have to upload those files into the Shopimint App Builder. To upload them you need to go to Shopimint App Builder - Firebase Settings page. First, upload your google-service.json file. Click on the Upload google-service.json file button and select your downloaded google-service.json file from your download location. After the upload is finished click on Upload GoogleService-info.plist button. Upload the GoogleService-info.plist file by following the steps mentioned above again.
Now save your changes by pressing the Save Changes button in the bottom-right corner.